Notes Experience
When you need to record internal information without notifying the contact, the best place to do so is 'Notes.' However, we saw opportunities to enhance how you find your notes and improve efficiency. So, we’re happy to introduce a few improvements that will take your collaboration and organization to the next level.
⭐️How Will These Changes Affect You:
Result Sorting: The new sort functions help you get the most important information first, allowing you to organize them by newest or oldest.

Search Function: You can pull up particular notes with the help of the new search function that allows you to use keywords to get results.

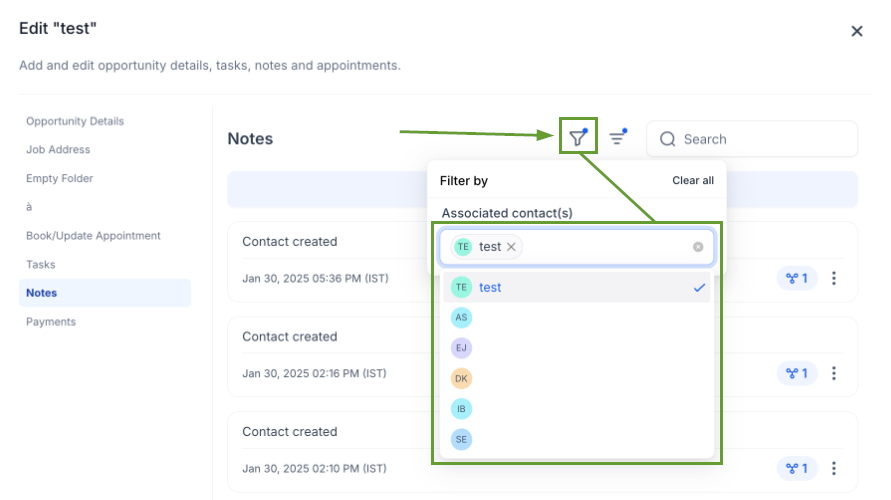
Contact Filtering: You can access notes for related contacts inside an opportunity, giving you a complete picture. However, you can limit the results to a specific contact.

⭐️How To Use and Create Notes in Opportunities?
With the updates come a few small changes so, let's check how to create, view, and organize notes from your opportunities.
Navigate to the Opportunities tab and click the notes icon to open the file.

Click + Add Note to create a new note for the contact.

Click the funnel icon and select the associated contact names you’d like to view inside the notes.

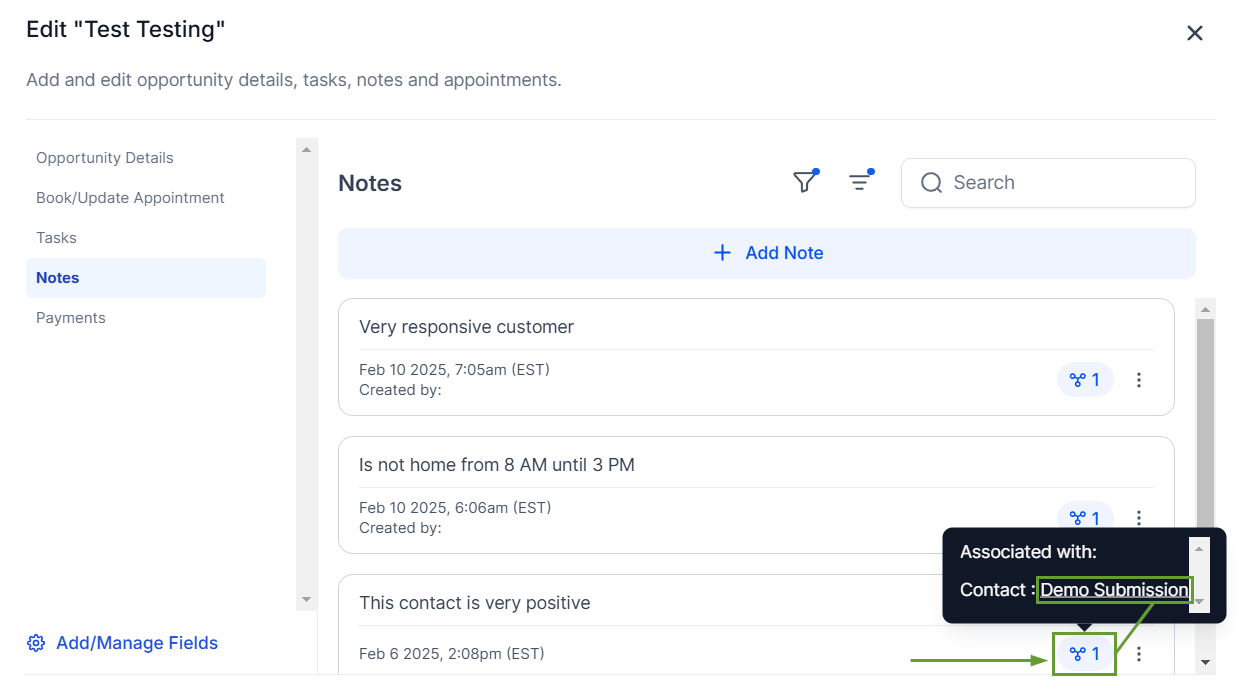
Hover over the three-circle icon to view the contact the note is related to, and click their name to be redirected to the contact card.

And there you have it- now you can easily create and find notes inside your opportunities and contacts by leveraging the updates done to these sections!


