


Inbound Email Trigger: Automate Replies and Start Workflows
Every inbound email is a potential lead, support request, or deal update. And when those messages sit unanswered, momentum slows down fast.
That is why the Inbound Email Trigger matters. It lets us start a workflow the moment an email hits the inbox, so we can respond faster, route messages to the right place, and keep customer communication consistent.
Used well, this trigger can help with:
- Lead capture from brand new senders
- Support intake for incoming customer questions
- Email routing based on sender or subject
- Follow-up automation with personalized details from the email itself
Why inbound email automation matters
Email is often the first point of contact. A person may be asking about your service, replying to an offer, or reaching out for help. In every case, speed matters.
When we automate the first response and the next step, we reduce manual triage and improve consistency. That means fewer missed leads, faster support handling, and a better experience for the person on the other end.
The Inbound Email Trigger is built for exactly that. It captures emails as soon as they arrive and gives us a clean way to decide what happens next.
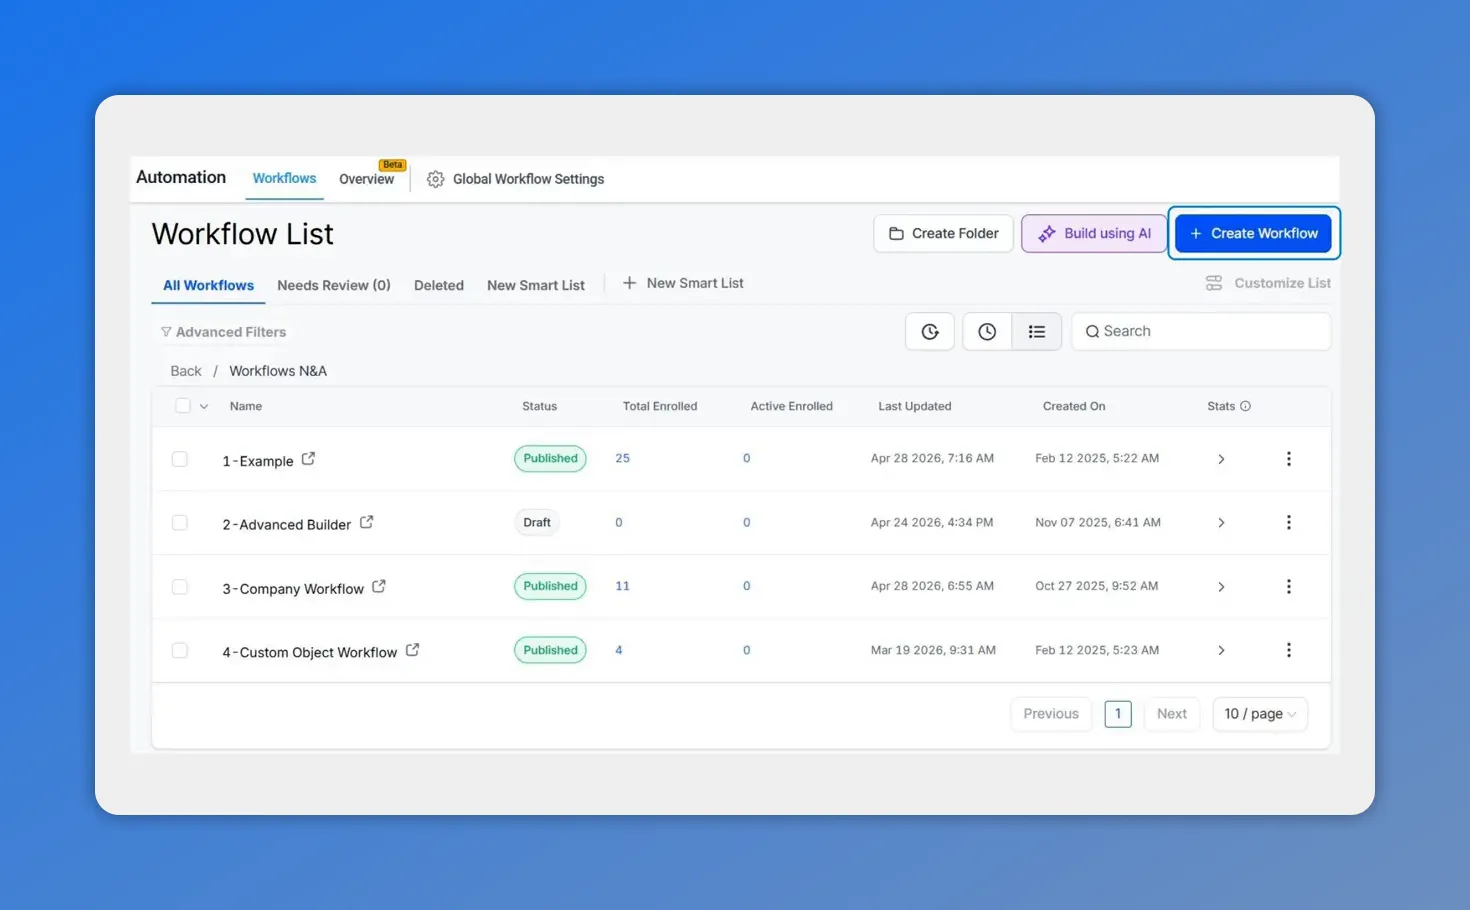
Before you set up the trigger, you’ll start in the Workflows area. This view helps confirm you’re in the right place to create a new workflow.
How to set up the Inbound Email Trigger
Setup is simple. Everything starts in the automation area.
- Go to Automation.
- Open the Workflows tab.
- Create a new build.
- Click Add New Trigger.
- Select Inbound Email.
Once that trigger is added, the workflow is ready to listen for incoming messages. From there, the real control comes from your filters and advanced settings.
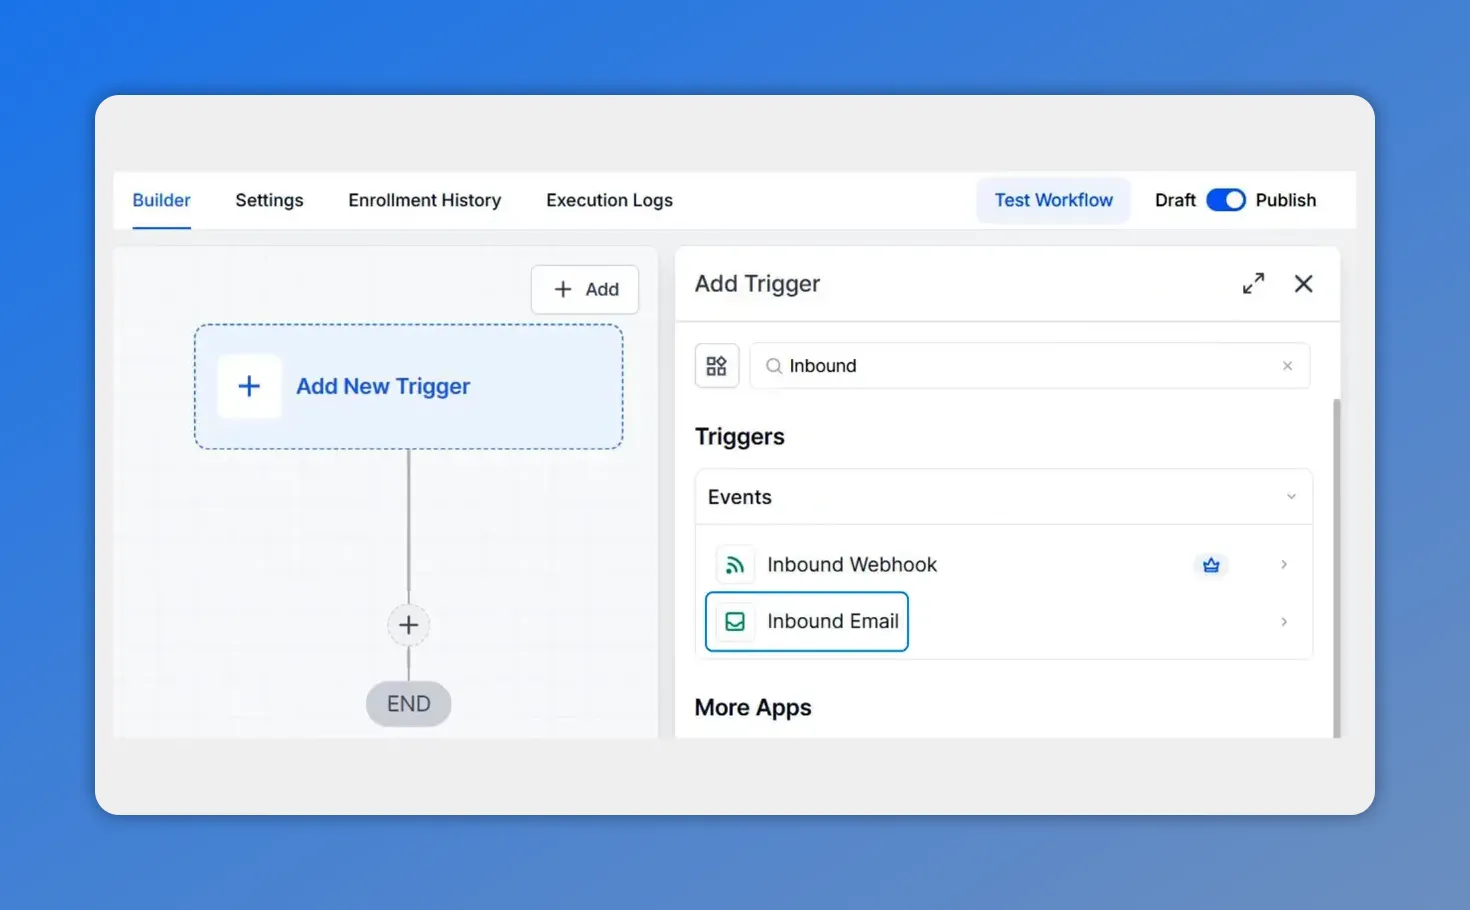
Add a new trigger, then choose the Inbound Email trigger so your workflow can start when a message hits the inbox.
Use filters to control when the workflow runs
Not every email should trigger the same workflow. That is where filters come in.
We can add filters to narrow down exactly when the workflow should fire. Based on the available options described for this trigger, that can include things like:
- From
- Subject
- Replied to Workflow
These filters help us create focused automations instead of broad ones.
For example, we might want one workflow for support-related subject lines and another for sales inquiries. Or we may only want the trigger to run for emails coming from outside our existing internal team.
The goal is simple: make sure the right email starts the right workflow.
What filters help us do
- Separate lead inquiries from support messages
- Prevent unrelated emails from triggering automation
- Build more targeted replies and internal routing steps
- Keep workflows easier to manage over time
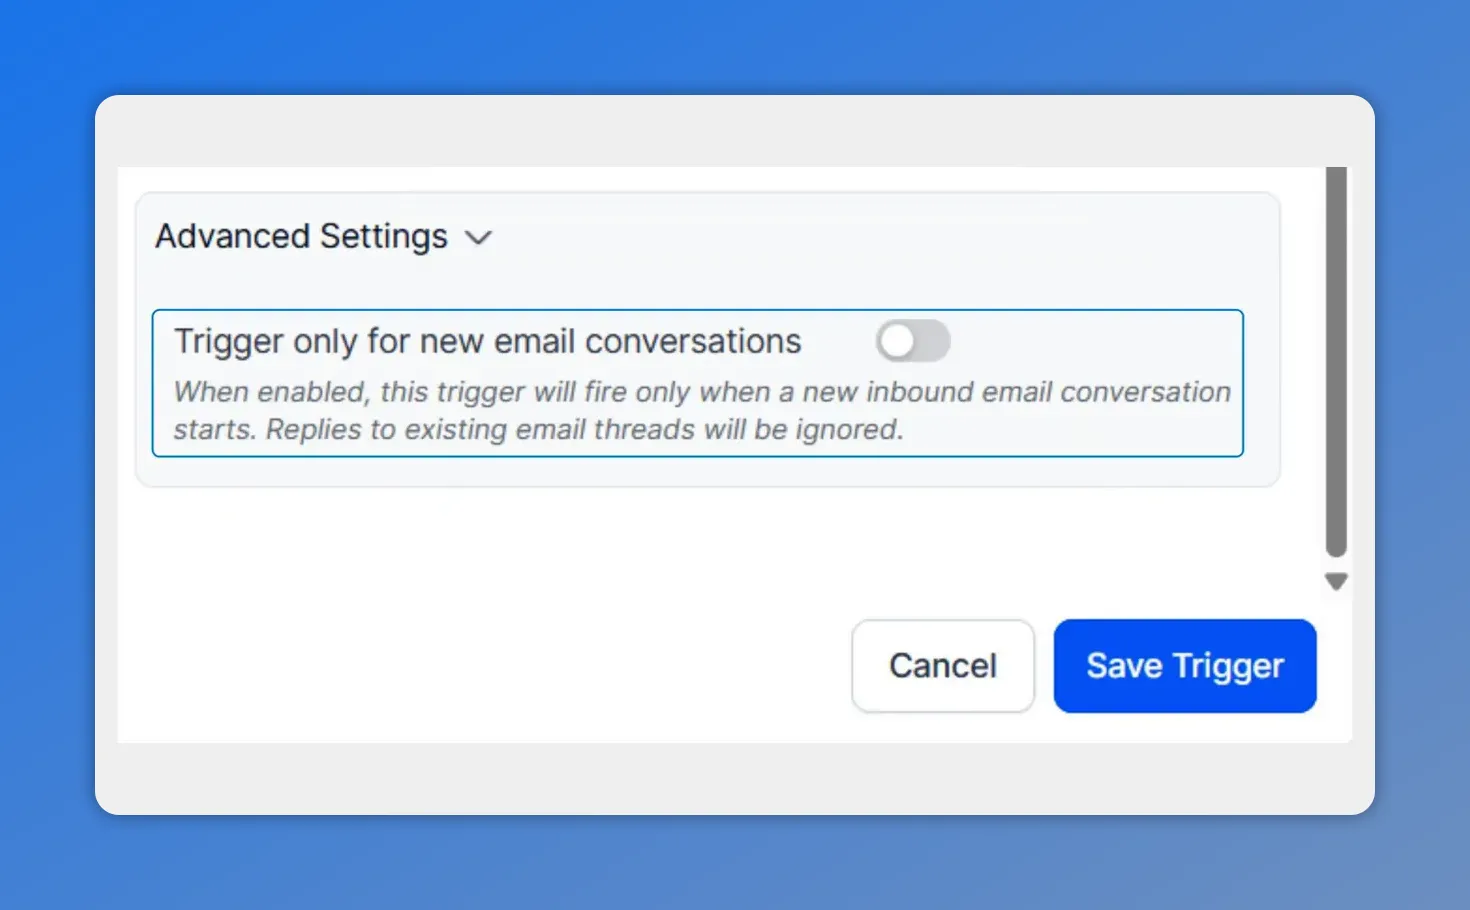
Turn on the advanced setting so the workflow fires only when a brand new email conversation starts, and ignores replies in existing threads.
Advanced setting: trigger only for new email conversations
One of the most useful settings here is the option to trigger only for new email conversations.
When this is turned on, the workflow ignores replies in existing threads. That means the automation will fire only when a brand new email conversation starts.
This is helpful when we want to automate first-touch responses without repeatedly triggering the same workflow every time the conversation continues.
When this setting is turned off, replies inside existing threads can also trigger the workflow. That gives us more flexibility, especially if follow-up replies should create actions as well.
A simple way to think about it:
- On: best for new inquiries and first-contact workflows
- Off: best when replies should also restart or continue automation
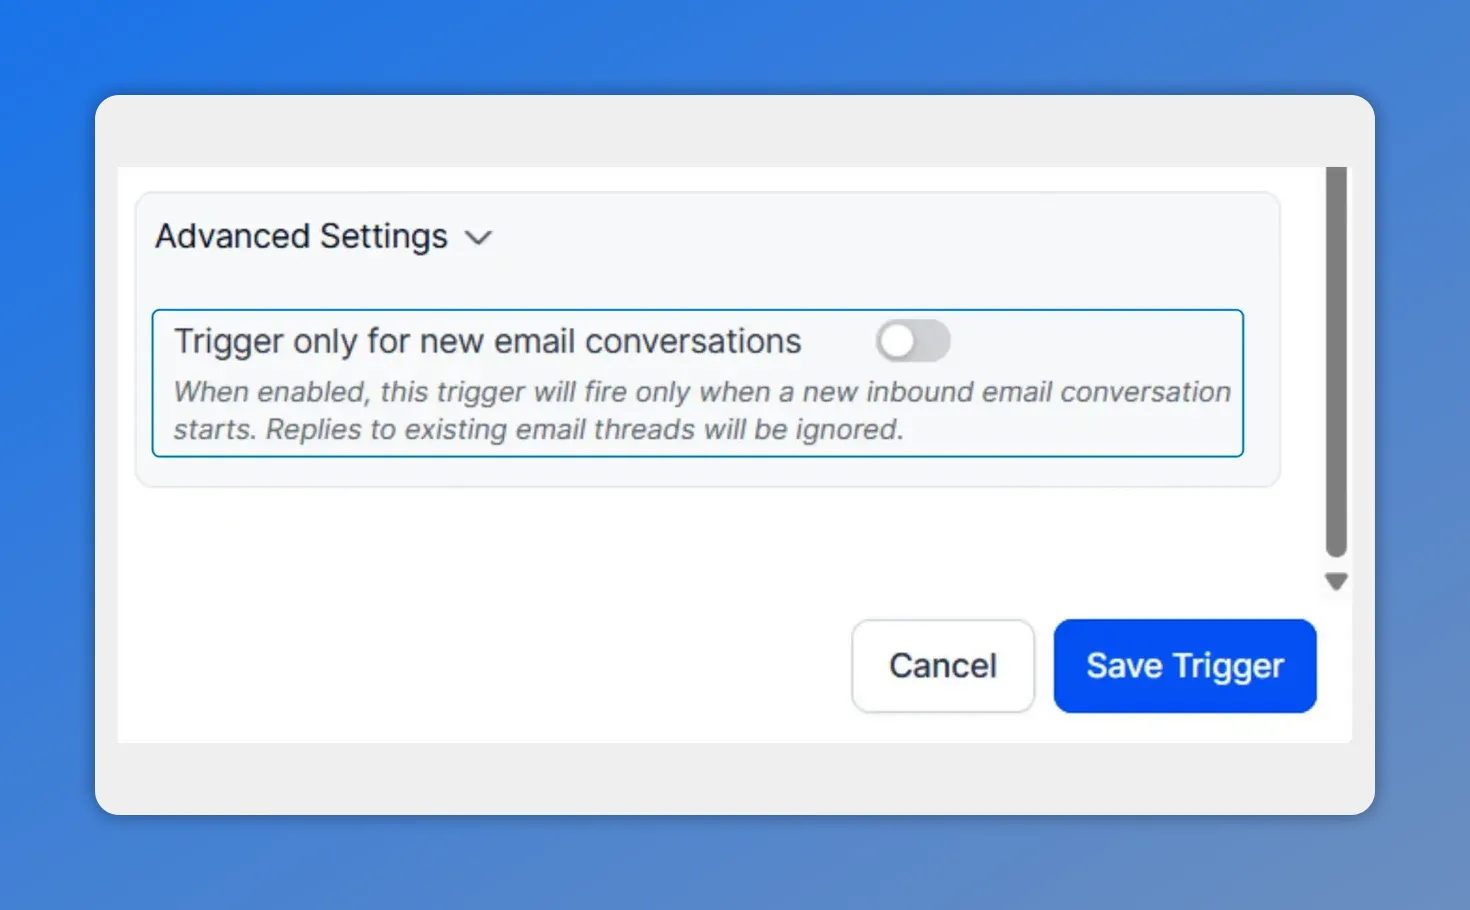
Enable “Trigger only for new email conversations” so the workflow fires only for first-touch threads and ignores replies in existing ones.
What kinds of emails this trigger can handle
The Inbound Email Trigger is flexible enough to cover several common email scenarios.
- Cold emails from brand new senders, including people not yet in the CRM
- Warm emails from existing contacts who already have a relationship with the business
- Replies in existing threads, if the advanced setting allows them
That range matters because not all inbound communication looks the same. Some contacts are reaching out for the first time. Others are continuing an existing conversation. This trigger gives us control over both.
How personalization works with custom values
Automation works best when it does not feel generic. That is why the included custom values are important.
We can use the Custom Value Picker to pull details from the incoming email directly into workflow actions. That may include:
- The full email body
- Thread content
- Other email details available through the trigger
This makes it easier to personalize responses and route messages with more context. Instead of sending a generic acknowledgment, we can build automations that reference what actually came in.
That helps with both customer experience and internal operations. Teams get better context. Contacts get more relevant communication.
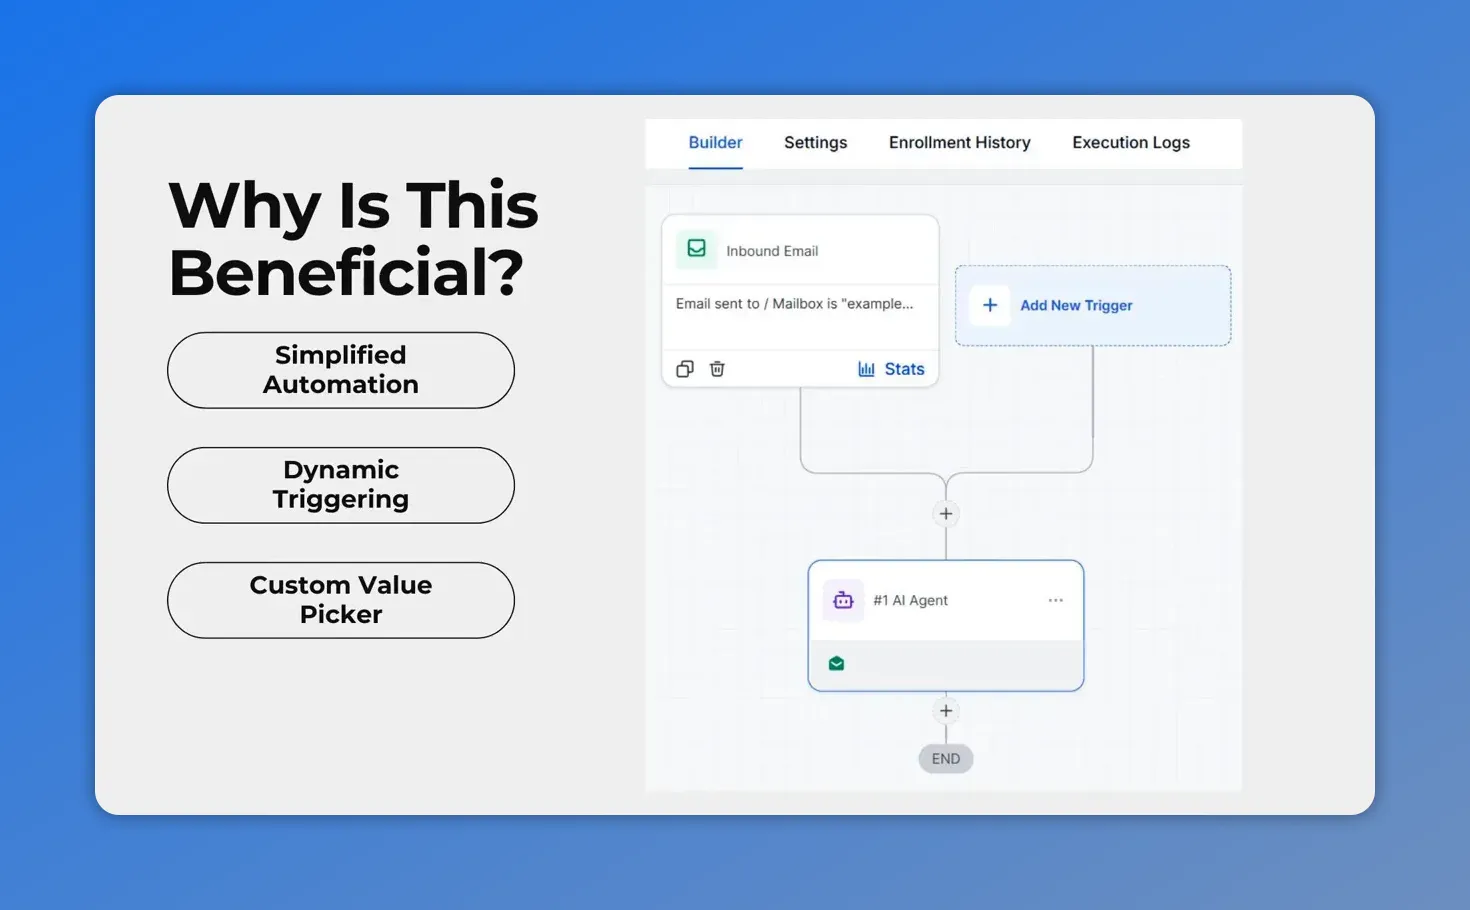
This workflow view highlights the Inbound Email trigger in the automation builder, showing how incoming email starts the process and connects to subsequent actions.
Practical ways to use the Inbound Email Trigger
There are several useful ways to put this trigger to work right away.
1. Auto-acknowledge new inquiries
When someone sends a first-touch email, the workflow can start immediately and send a fast acknowledgment. That reassures the sender their message was received and sets the tone for a responsive experience.
2. Route emails to the right team
By using sender- or subject-based filters, we can direct messages where they belong. Sales inquiries can follow one path. Support requests can follow another.
3. Standardize support intake
Support teams often deal with repeated types of requests. An inbound email workflow can capture those messages, trigger the right process, and make sure nothing gets missed in manual sorting.
4. Follow up with better context
Because the trigger includes email content as custom values, we can build follow-up actions that use information from the message itself. That leads to more relevant replies and better handoffs.
What a strong workflow setup looks like
A good workflow usually follows a simple structure:
- Trigger: An inbound email arrives.
- Filter: The workflow checks whether the sender, subject, or thread conditions match.
- Decision: The workflow determines whether this is a new conversation or part of an existing thread.
- Action: It sends a reply, routes the email, starts support intake, or kicks off a follow-up process.
- Personalization: It uses custom email values to make the next step more relevant.
That structure keeps the workflow useful without making it overly complex.
When to use new conversation mode and when not to
If your main goal is to respond to first-time outreach, turn on Trigger only for new email conversations. This avoids repeated automation on every reply and keeps the workflow focused on initial contact.
If your process depends on replies inside existing threads, leave that setting off. That way, the workflow can react to continued email activity as well.
The right choice depends on whether you are automating first contact, ongoing support, or deal progression.
Key benefits of using the Inbound Email Trigger
- Faster response times for leads and support requests
- Less manual triage for incoming email
- Better consistency in how messages are handled
- More precise routing with filters and workflow logic
- Personalized automation using inbound email content
And because the trigger starts the workflow the moment the email lands, it helps us act while the conversation is still fresh.
Quick setup checklist
If you want a simple path to launch, use this checklist:
- Open Automation and go to Workflows
- Create a new build
- Click Add New Trigger
- Select Inbound Email
- Add filters such as From, Subject, or Replied to Workflow
- Choose whether to trigger only for new email conversations
- Use custom values to personalize actions
- Publish the workflow
FAQ
What does the Inbound Email Trigger do?
It starts a workflow automatically when an inbound email reaches your mailbox. This can be used for replies, lead capture, support intake, routing, and follow-up automation.
Where do we add the Inbound Email Trigger?
Go to the Automation section, open Workflows, create a new build, click Add New Trigger, and choose Inbound Email.
Can we limit which emails start the workflow?
Yes. We can apply filters such as From, Subject, and Replied to Workflow to control exactly when the trigger fires.
What does “Trigger only for new email conversations” mean?
It means the workflow will run only for brand new email threads. Replies inside existing conversations will be ignored when this setting is enabled.
Can the trigger work for replies in existing threads?
Yes. If we do not enable the new-conversation-only setting, replies in existing email threads can also trigger the workflow.
Can we personalize workflow actions using the incoming email?
Yes. The Custom Value Picker can pull in details such as the full email body and thread content, so responses and follow-up actions can use real message context.
What types of emails can this trigger handle?
It can handle cold emails from new senders, warm emails from existing contacts, and replies inside existing threads if that option is allowed in the settings.
The Inbound Email Trigger gives us a simple way to act faster on the messages that matter. When every incoming email can represent a lead, support request, or next step in a deal, automation helps us respond with more speed, more consistency, and better context.
This article was created from the video Inbound Email Trigger: Automate Replies and Start Workflows