


Advanced Workflow Builder: Drag-and-Drop Automation on an Open Canvas

Overview
Our Advanced Workflow Builder gives you a free-form canvas for designing automations visually. Instead of a linear list, you can place, connect, and rearrange logic exactly how you want. The result is faster, clearer, and more intuitive workflow design.
How to get started
Here’s how to open the Advanced Builder and begin a new flow:
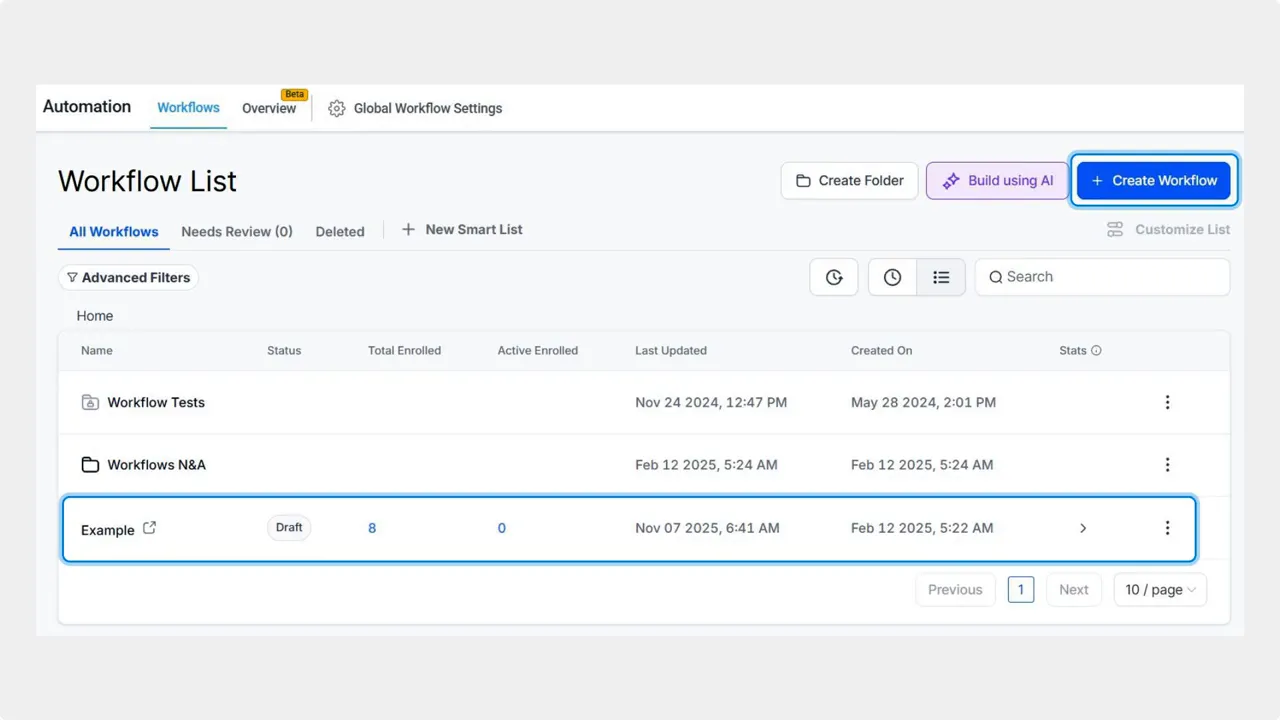
- Go to the Workflows tab inside the Automation section and create or edit a build.
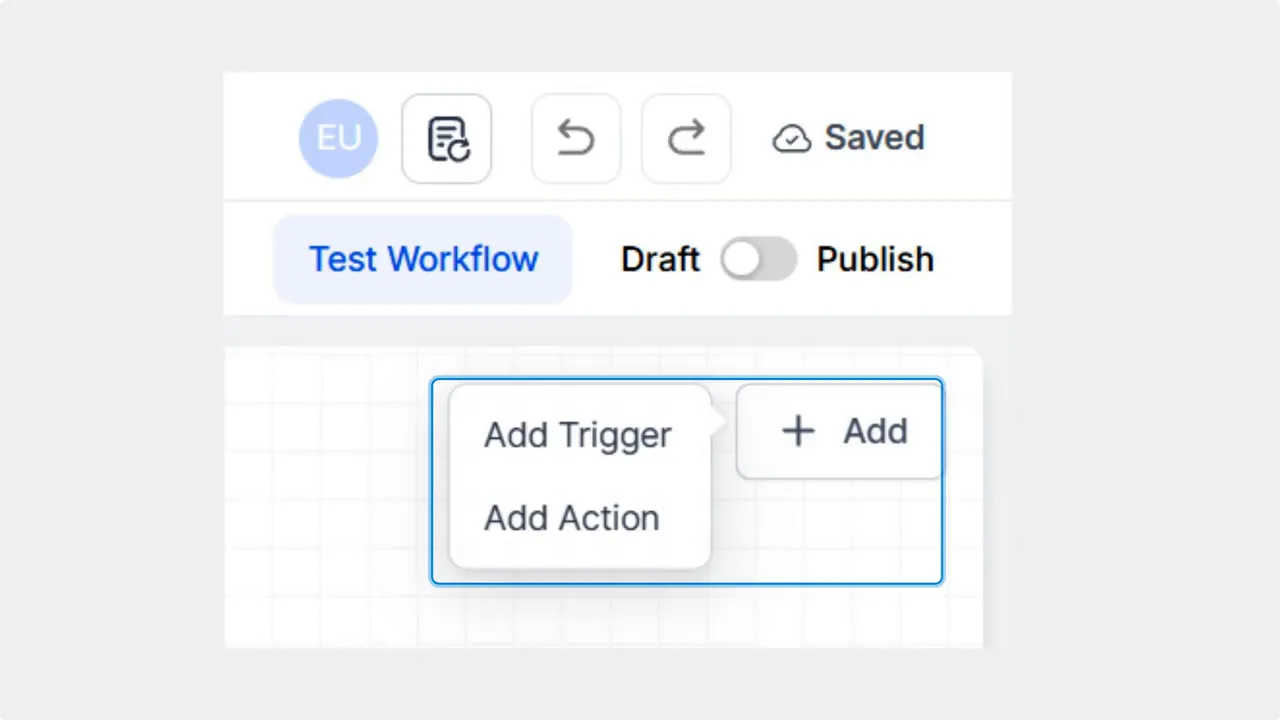
- Open the top-left dropdown and switch to the Advanced Builder.
- Click + Add, then choose to insert an action or a trigger.
Building with nodes: drag, drop, connect
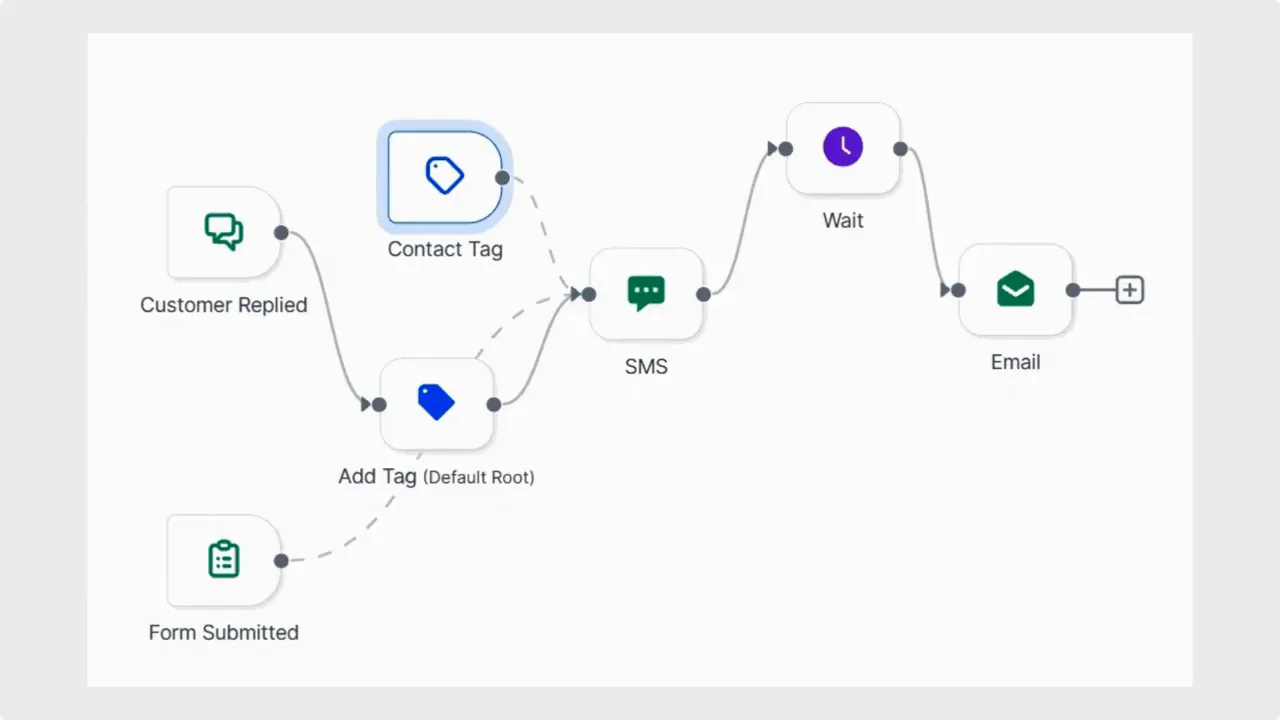
Workflows are built from nodes that represent triggers and actions. You can connect nodes using the connector handle or the plus icon. Just drag from one node to another to stitch the flow together.

Rerouting and editing paths
If a node connects automatically and you want a different path, you can reroute it. Use the trash can icon to remove the automatic connection, then reconnect the node where you want it.
Manage multiple workflows in one canvas
The Advanced Builder supports delinked nodes so you can manage multiple workflows on a single canvas. That means you can start contacts on different actions depending on which trigger fires, all within the same visual layout.

Speed and clarity features
We added several quality-of-life features to help you work faster and keep flows readable:
- Keyboard shortcuts for quick actions.
- Color coding to visually separate branches and actions.
- Auto Layout for automated organization of nodes.

Why the visual canvas matters
Replacing the linear list with a visual canvas makes complex logic much easier to understand. You can place, connect, and rearrange items exactly where they make sense. This reduces confusion when flows branch or when multiple triggers and actions interact.
"This new builder type has everything you love about workflows, but faster, clearer, and more intuitive than ever."
Embed
Quick checklist: Getting the most from the Advanced Workflow Builder
- Switch to the Advanced Builder from the top-left dropdown.
- Add triggers and actions with + Add.
- Connect nodes by dragging from the connector handle or plus icon.
- Reroute by deleting unwanted links with the trash can icon.
- Use color coding and Auto Layout for clarity.
- Learn the keyboard shortcuts to speed up your work.
FAQ
How do we open the Advanced Workflow Builder?
Go to Workflows under Automation, create or edit a build, then use the top-left dropdown to switch to the Advanced Builder.
How do we add actions or triggers?
Click + Add and select whether you want to insert an action or a trigger.
How do we connect nodes?
Drag the connector handle or the plus icon from one node to another to stitch the workflow together.
What if a node connects the wrong way?
Click the trash can icon to remove the connection, then reconnect the nodes where you want them.
Can we manage multiple workflows on the same canvas?
Yes. The builder supports delinked nodes so you can have separate workflows and start contacts on different actions based on their triggers, all in one canvas.
What features help with layout and speed?
Use keyboard shortcuts, color coding, and Auto Layout to organize nodes quickly and keep your canvas clear.
Final note
Our Advanced Workflow Builder keeps the power of workflows while making the design process visual and flexible. It helps teams build, edit, and understand automations faster. Try it in your next build to see how the open canvas improves clarity and speed.
This article was created from the video Advanced Workflow Builder: Drag-and-Drop Automation on an Open Canvas