


Manage Smart Lists and Restore moved to three-dot menu
We simplified the Contact List View to reduce header clutter and make frequently used actions easier to find. The Manage Smart Lists and Restore Contacts options have been moved into a single actions menu under the three-dot icon next to the Add Contact button. The workflows remain the same, but finding and using these tools is now more consistent across the app.
What changed
The header options were streamlined. Instead of showing Manage Smart Lists and Restore in the top header, we moved them to the actions menu next to the Add Contact button. This keeps the header clean while keeping tools close to where you work.
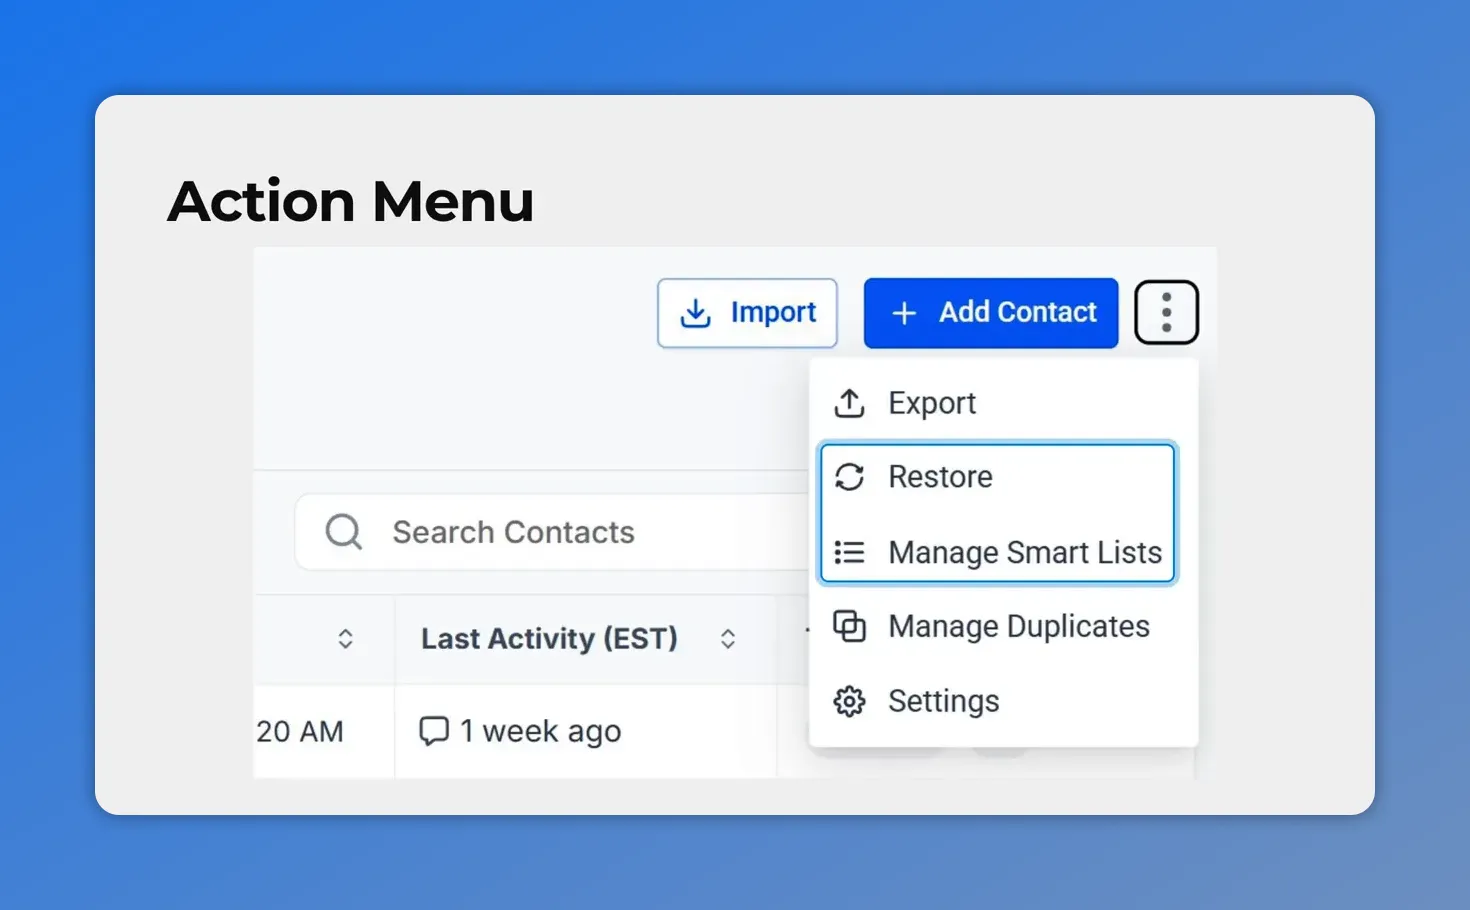
Action menu next to Add Contact showing Restore and Manage Smart Lists.
Why this matters
Moving actions into the three-dot menu reduces visual clutter and groups related functions together. That makes navigation faster and more predictable. Since this menu layout is now consistent across sections, it helps users build familiarity with the system.
How to manage Smart Lists
Follow these steps to manage, delete, or share Smart Lists.
-
Open Contacts and select the Smart Lists tab.
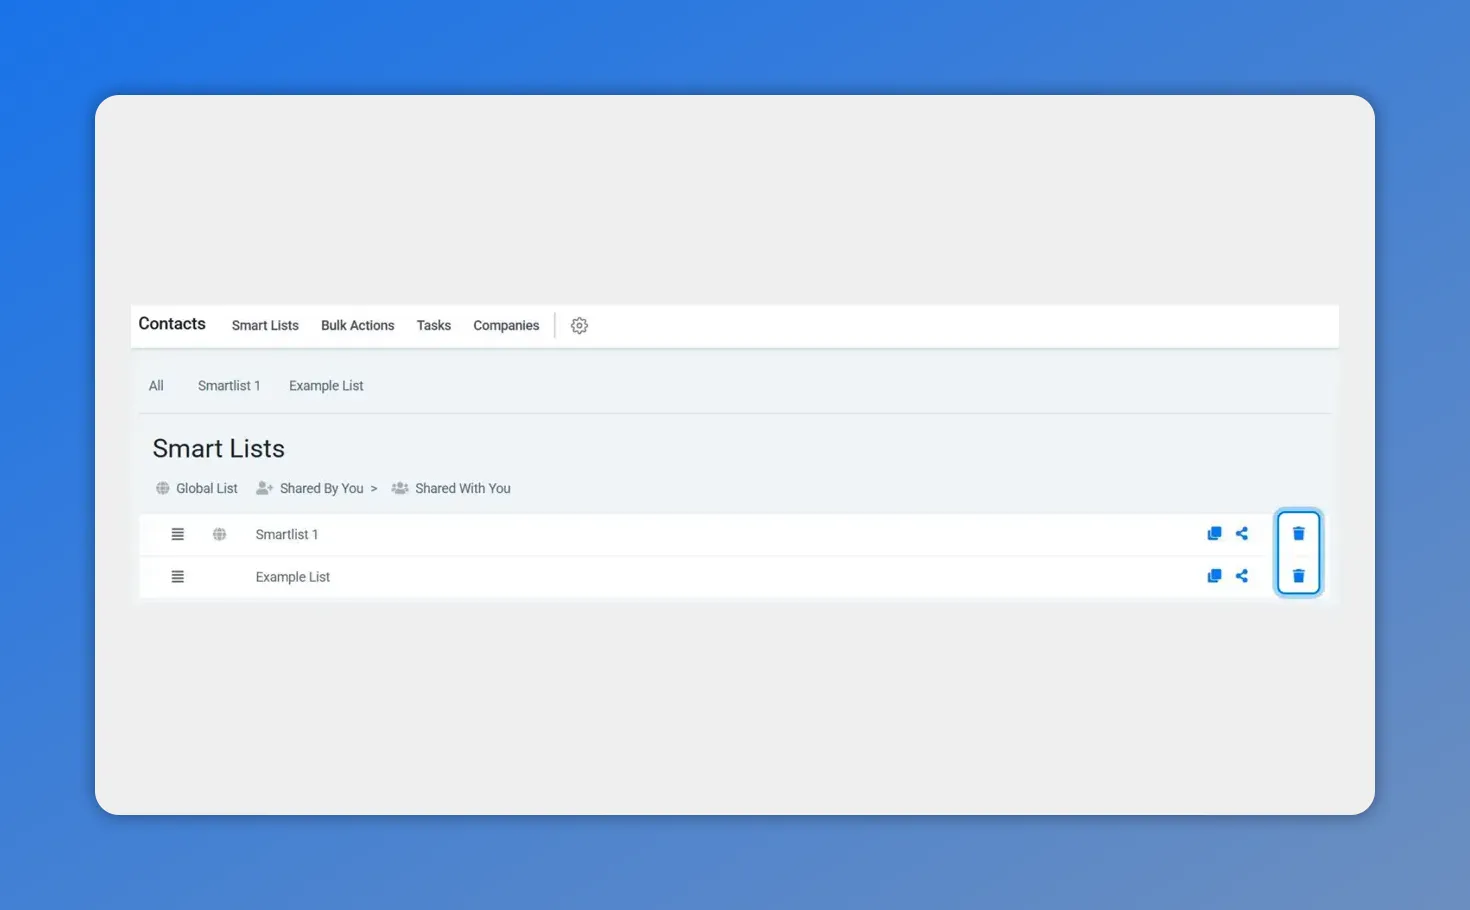
Open the Contacts workspace and select the Smart Lists tab to see your saved lists.
- Click the three-dot icon next to the Add Contact button, then choose Manage Smart Lists.
-
To delete a Smart List, click the trash can icon next to the list you want removed.
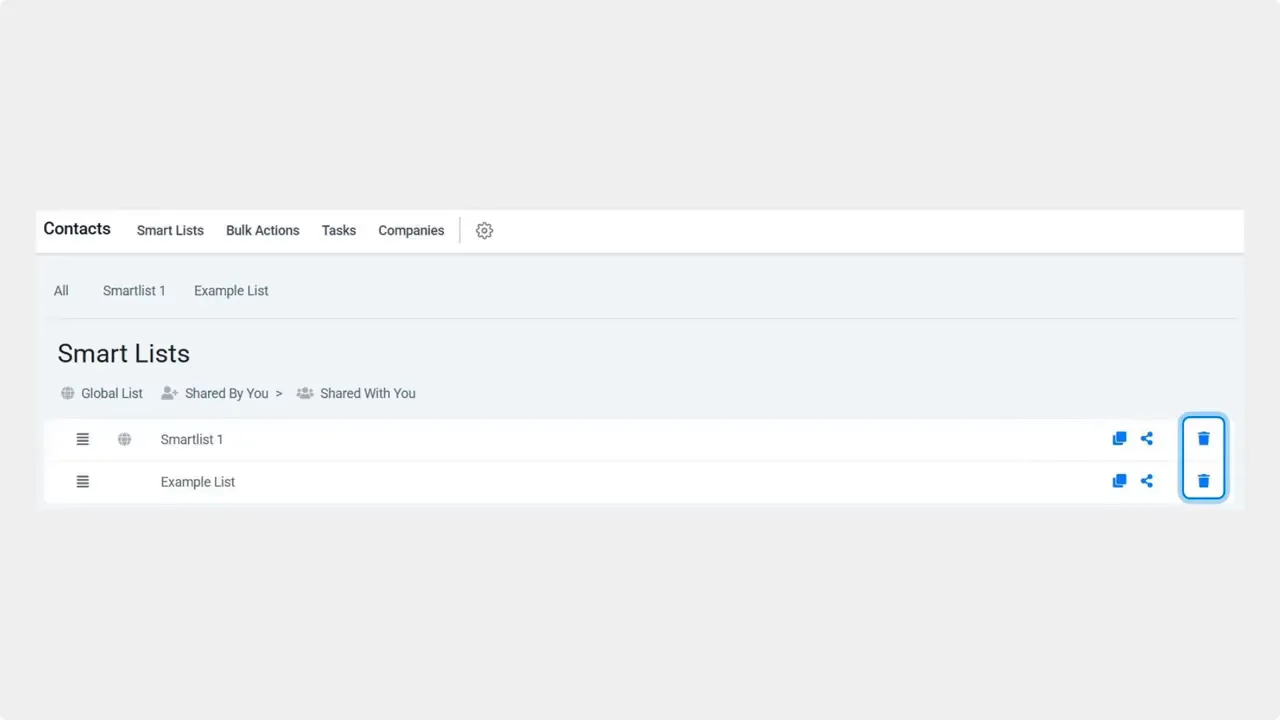
Click the trash can icon to delete a Smart List.
-
To share a Smart List with team members, click the share icon (three connected dots), check the boxes for the users to include, then click Save.
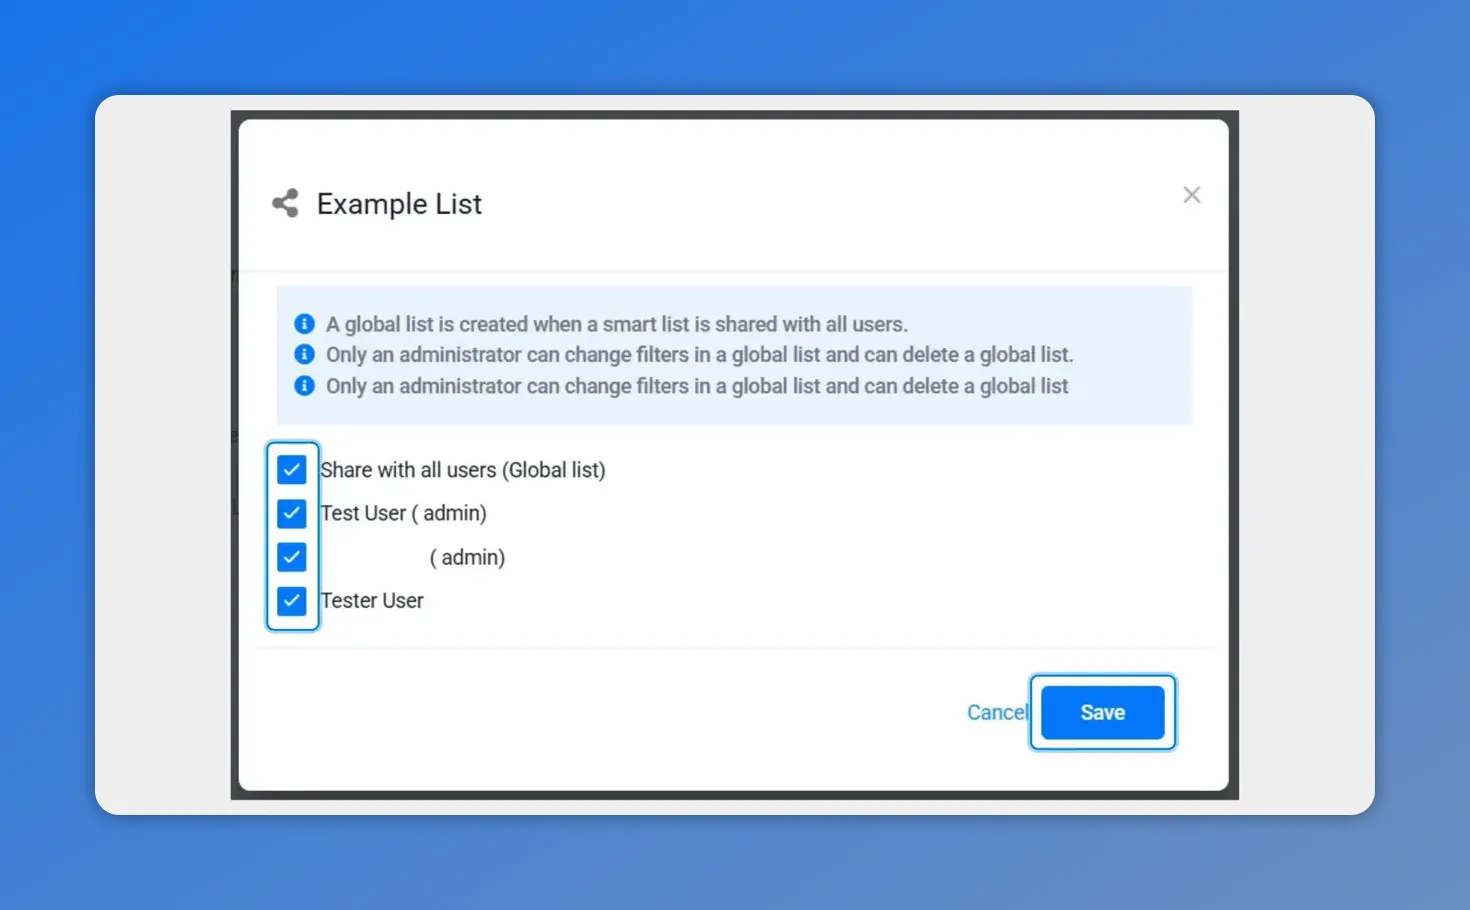
Share Smart List modal showing selected users; click Save to share.
How to restore contacts
The restore workflow itself is unchanged. It simply lives now under the same three-dot actions menu.
- Open Contacts and click the three-dot icon beside Add Contact.
- Select Restore from the actions menu.
- Follow the restore prompts to recover contacts.
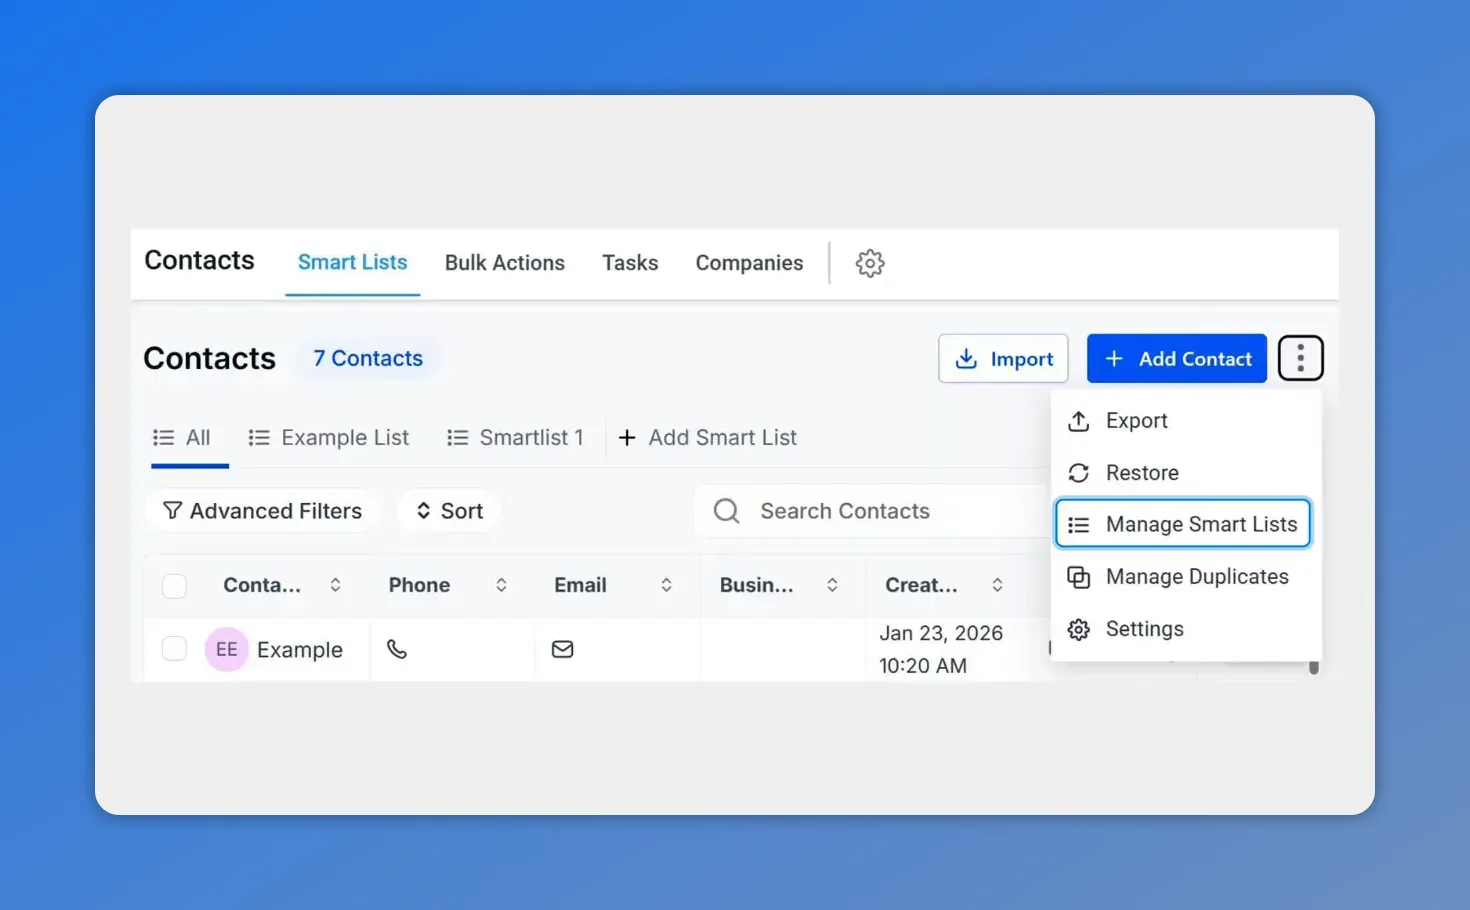
Open the three-dot actions menu beside Add Contact and choose Restore or Manage Smart Lists.
Practical tips for admins and users
- Keep Smart Lists organized and remove unused lists with the trash icon to reduce noise.
- Use the share feature to give teammates quick access to common lists instead of exporting or recreating them.
- Remember the three-dot actions menu is now the single place for these tools. Check there first when you can’t find an option in the header.
FAQ
Where did Manage Smart Lists and Restore go?
Both options were moved from the header into the three-dot actions menu next to the Add Contact button. The placement groups related actions and reduces header clutter.
Did the workflow change for deleting or sharing lists?
No. The workflows remain the same. Only the location changed. Use the trash can icon to delete and the three connected dots icon to share.
Who can share Smart Lists with other users?
Users with the appropriate permissions can share Smart Lists. When sharing, check the boxes next to the users you want to include, then click Save.
Has restoring contacts changed?
The restore process is unchanged. It is now accessed via the actions menu, but the steps to select and restore contacts remain the same.
Next steps
Open your Contacts workspace, click the three-dot actions menu beside Add Contact, and manage or share your Smart Lists or restore contacts as needed. This small change should make daily tasks faster and more consistent across the platform.
This article was created from the video Manage Smart Lists and Restore moved to three-dot menu