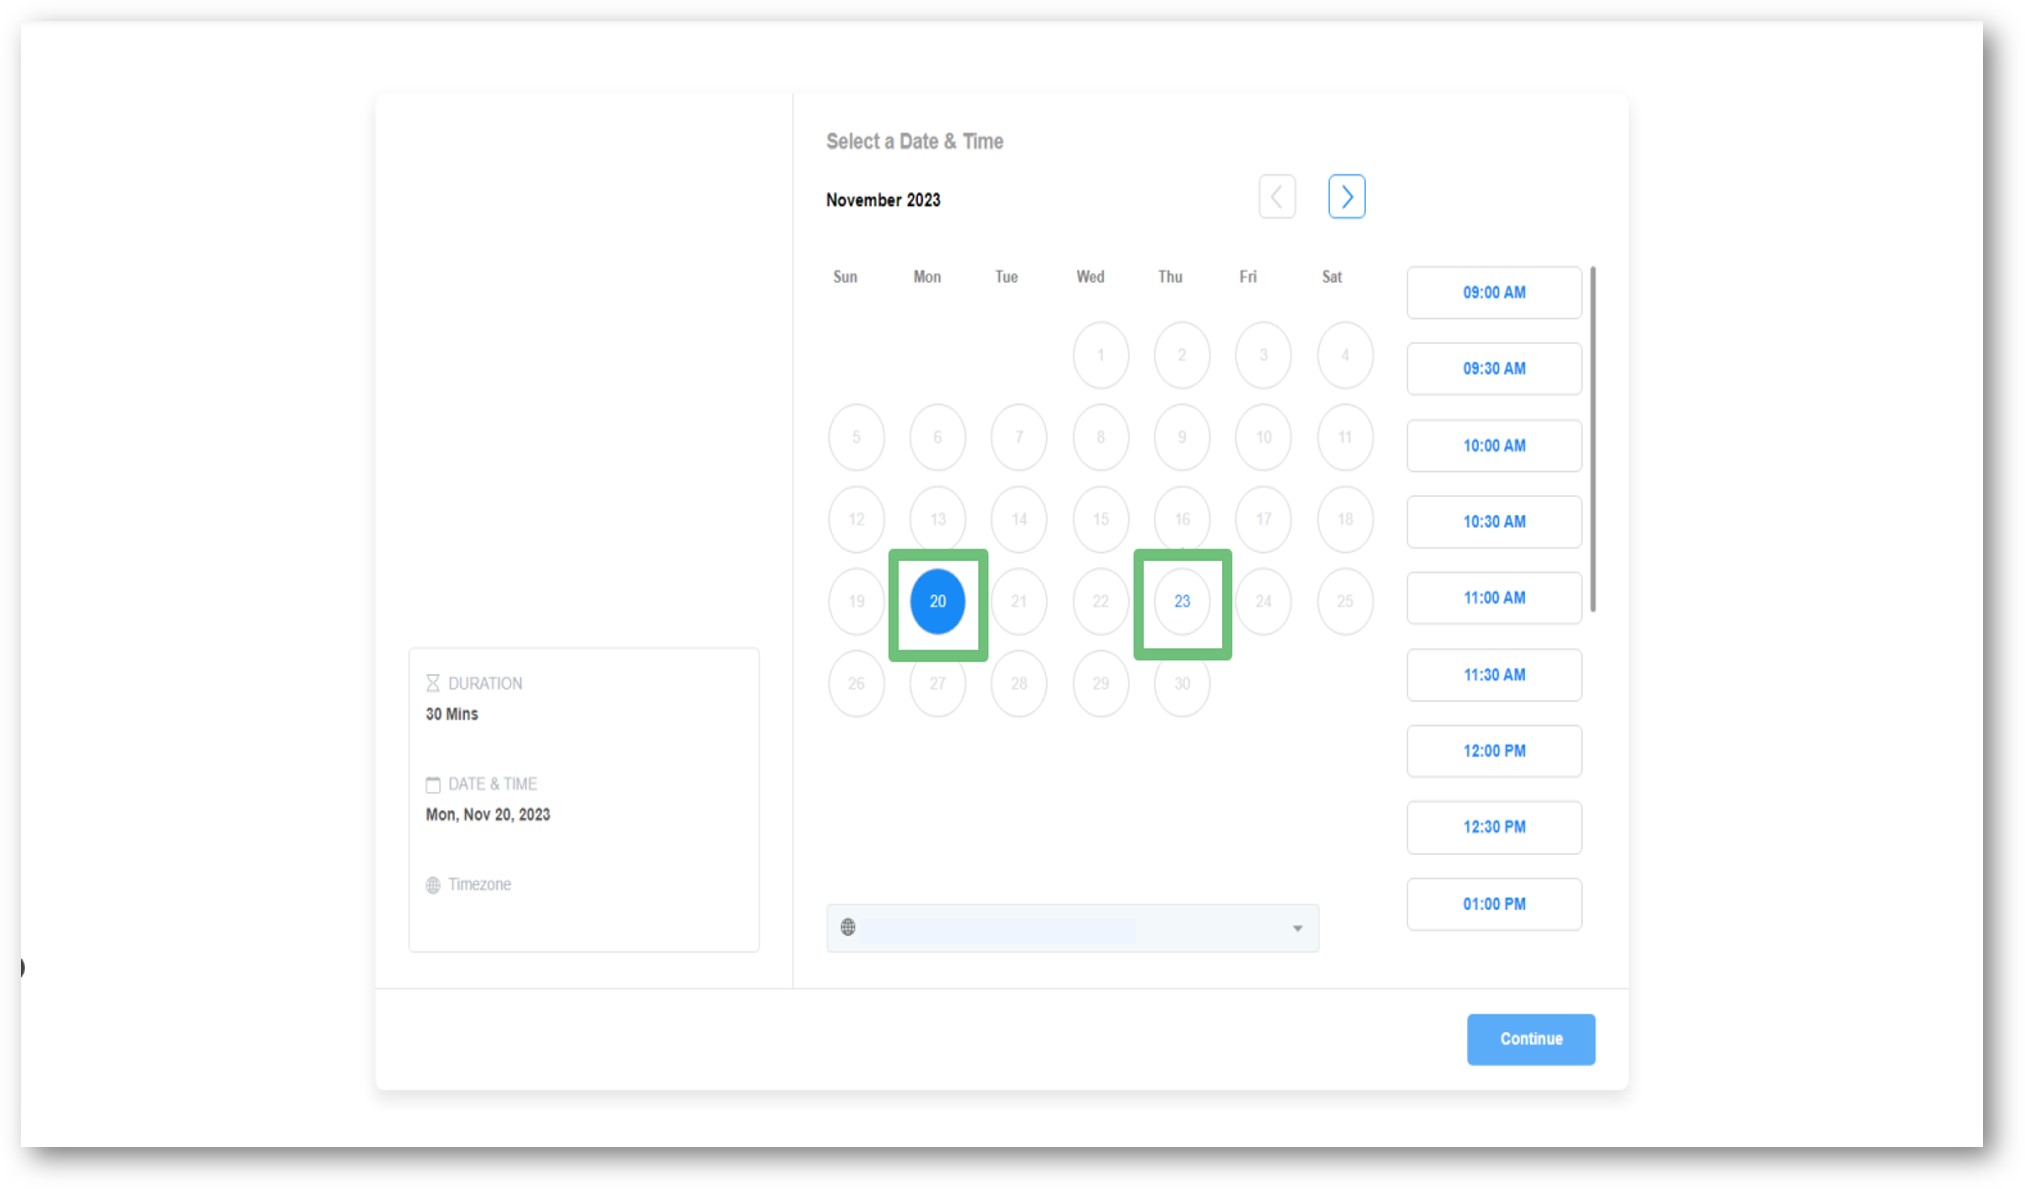
Auto Forward on Calendars to Find the Next Open Slot
Experience seamless scheduling with our CRM's latest enhancement to the calendar—auto-navigate functionality. No more manual jumps between months; the system now effortlessly scrolls to the next available slot, ensuring a frustration-free scheduling experience for you and your clients.
What is Auto Forward on Calendars to Find the Next Open Slot? The CRM's calendar now features auto-navigate functionality, automatically scrolling to the next available slot, eliminating the frustration of navigating to future months manually.👇🏻
⭐️ Why does it matter to your business?
Effortless Scheduling: Seamlessly move to the next available time slot without manual navigation.
Enhanced User Experience: Eliminate the need for users to search for open slots in different months, improving overall satisfaction.
Improved Conversion Rates: Streamline the scheduling process, potentially boosting conversion rates on your calendar widgets.
⭐️ How to Use Auto Forward on Calendars to Find the Next Open Slot:
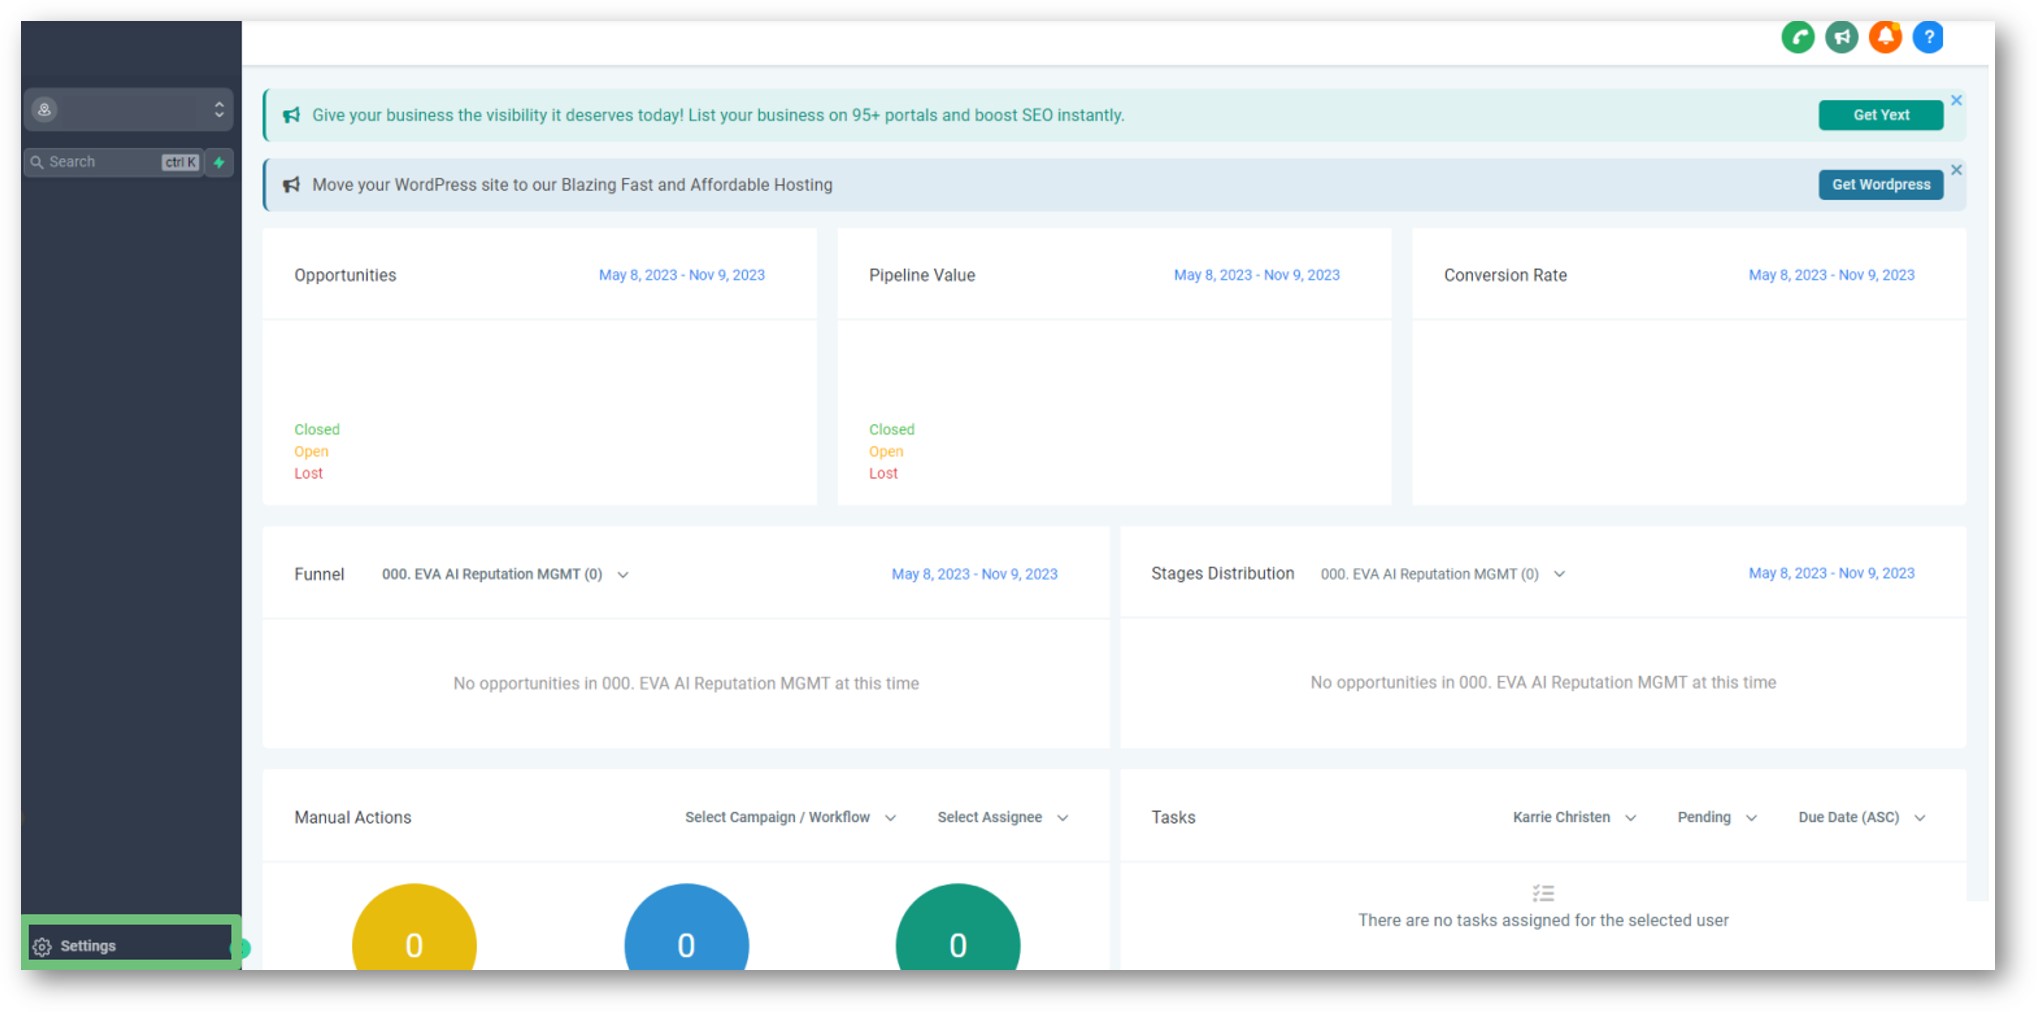
Access your CRM Account. On the bottom left side of your dashboard click on “Settings”.
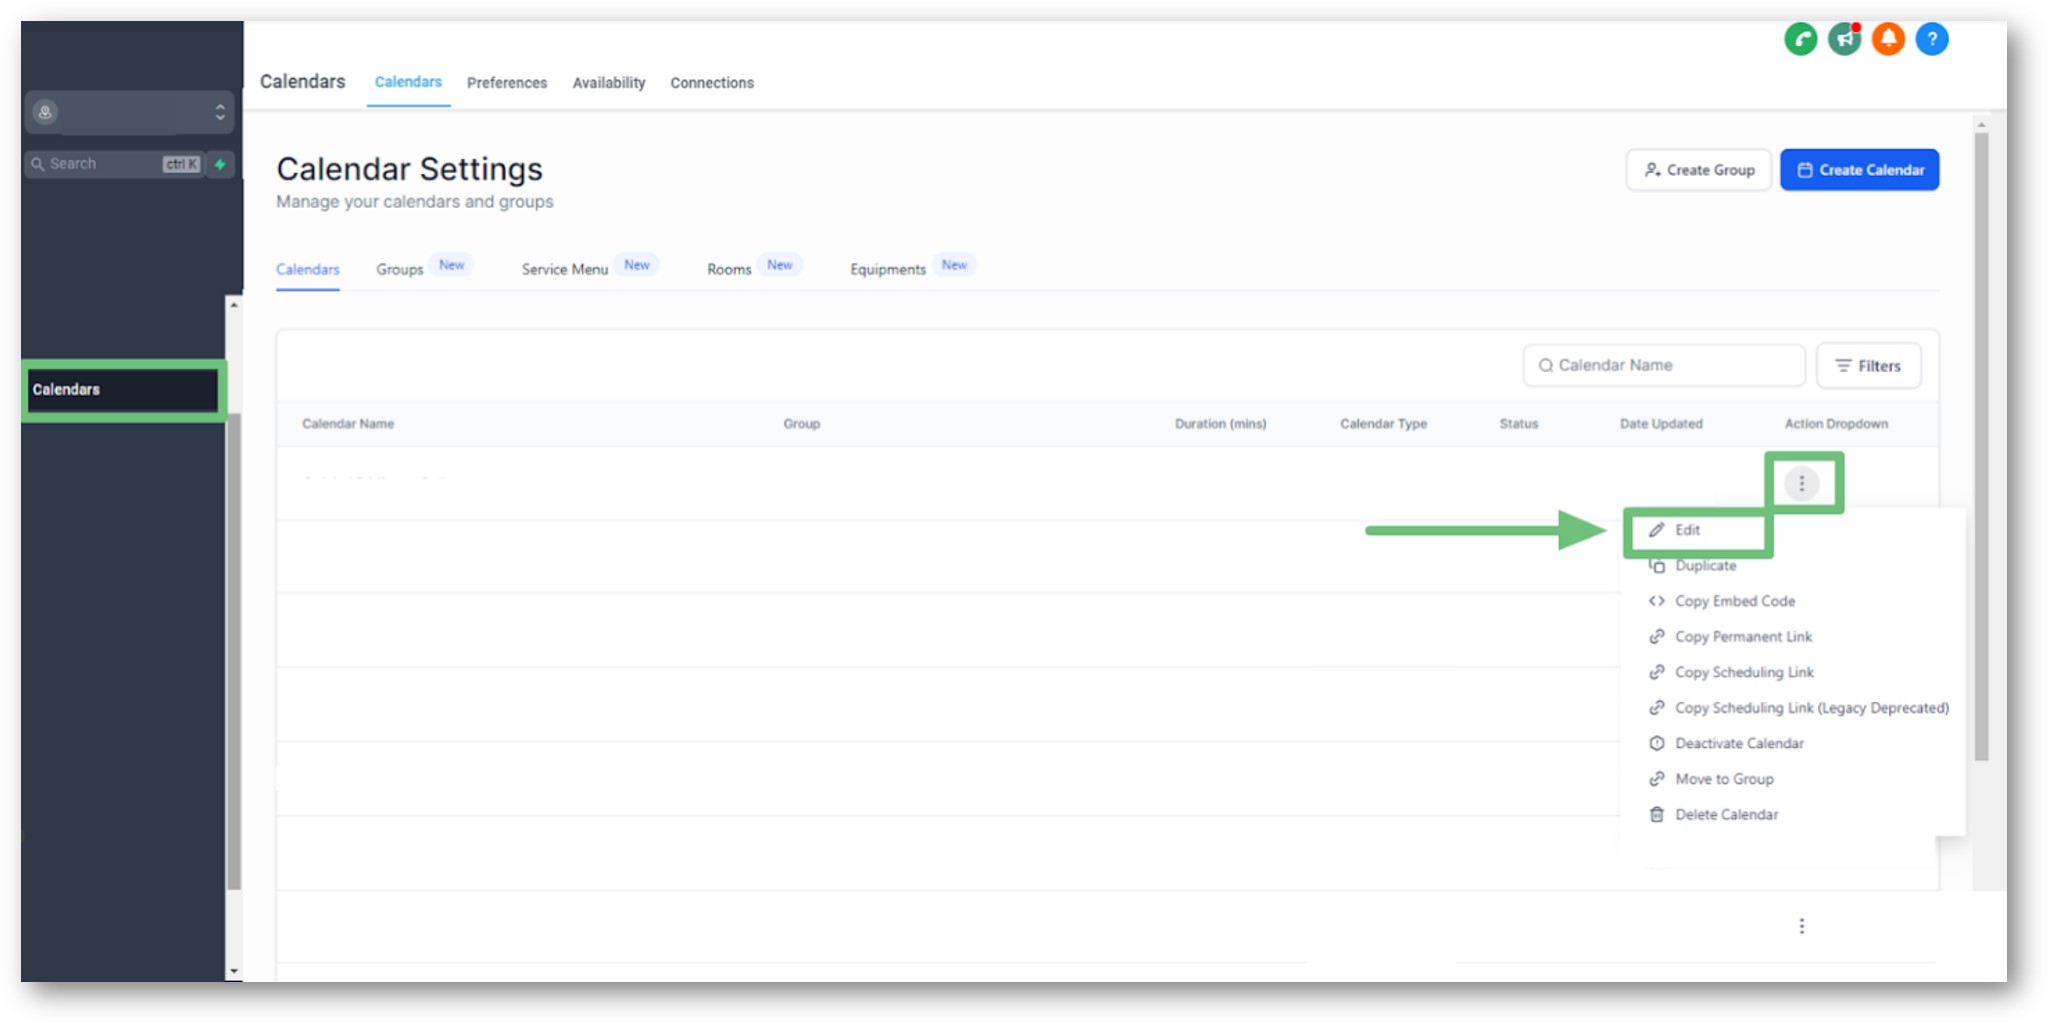
After you click on “Settings” you will see a new left-hand menu on your dashboard, now locate the option “Calendars” and click it. In the “Calendars” section find the calendar you would like to work on. Click on the three dots located on the right side of the calendar and then click on “Edit”.
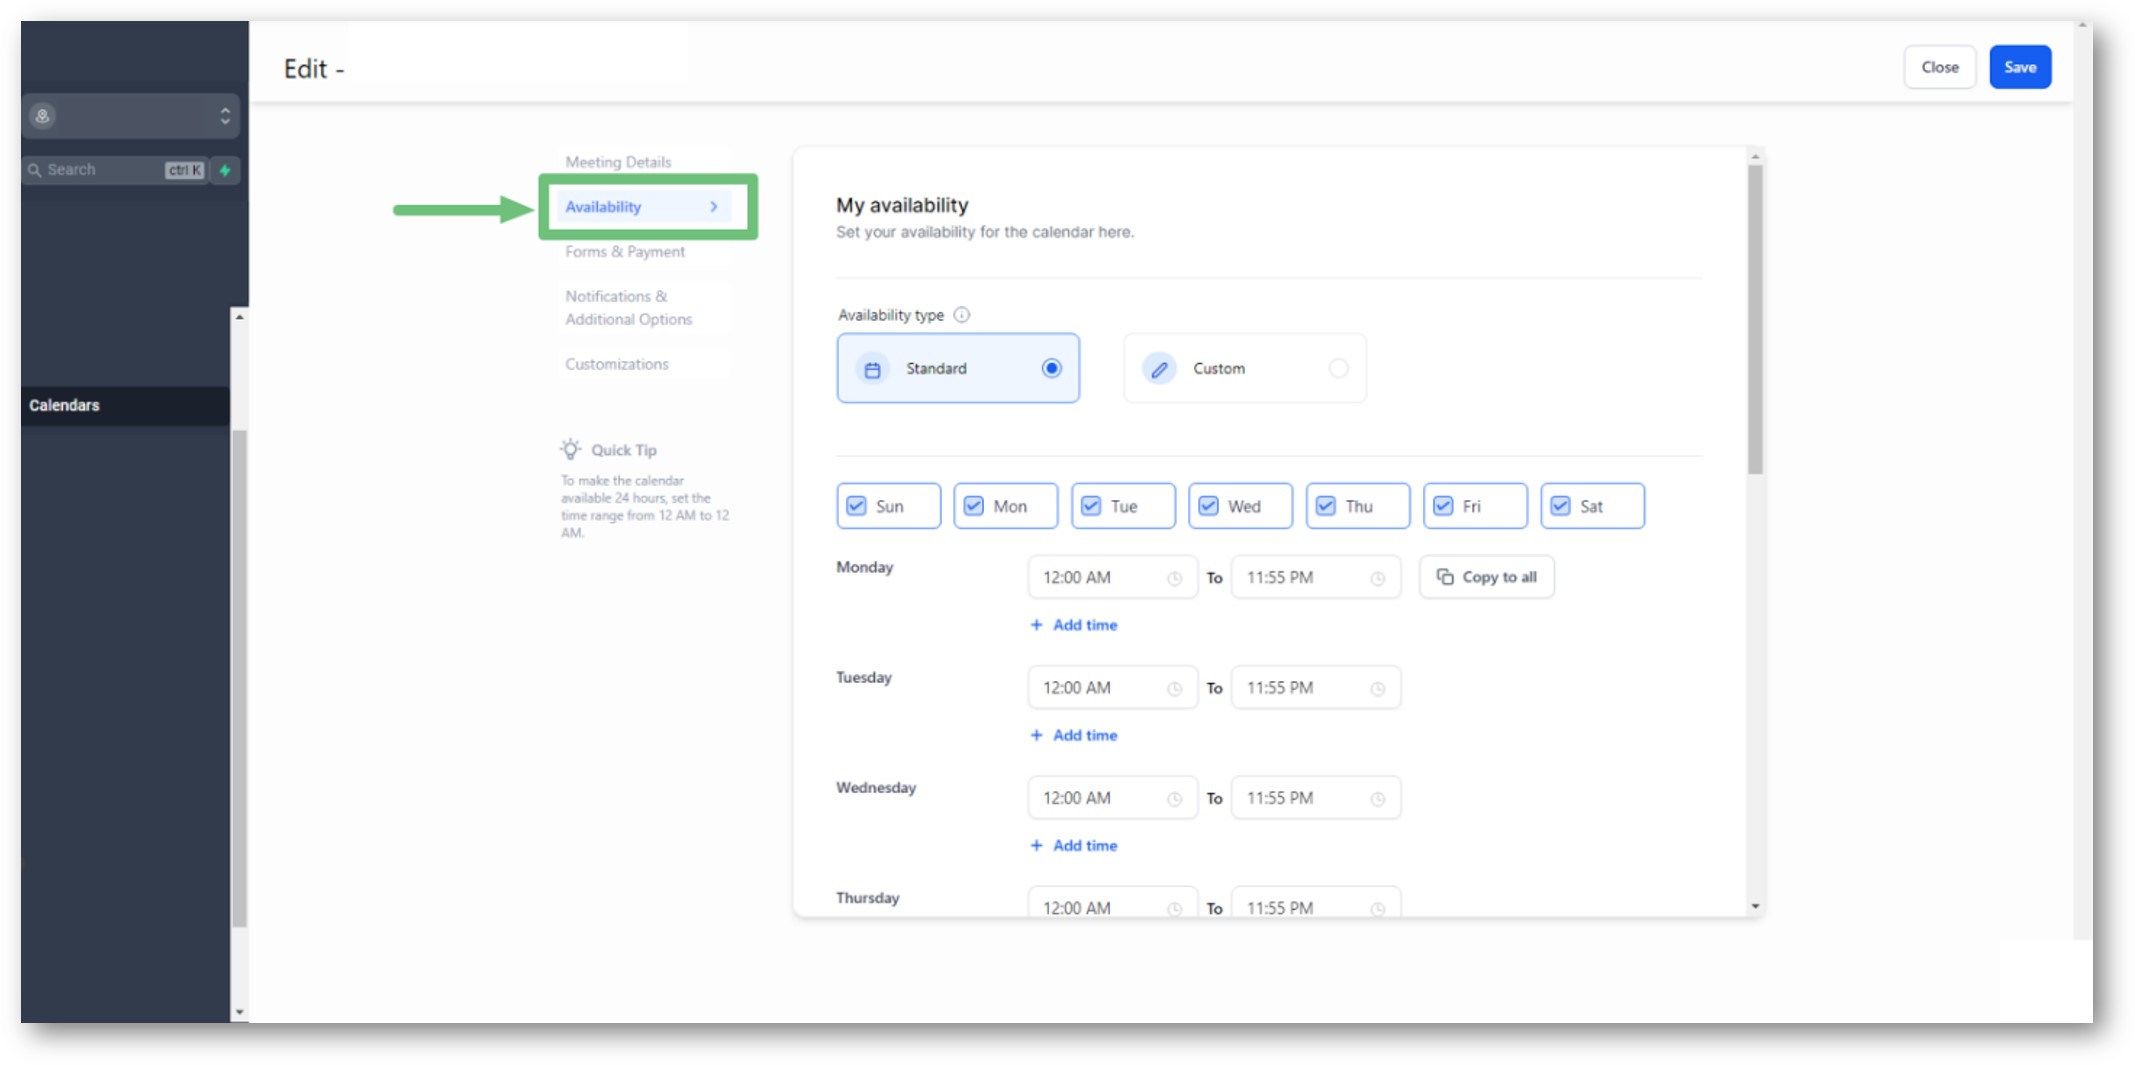
When you click on “Edit” a new menu will appear on your screen. On the top left of your screen click on “Availability”.
Then click on “Custom”, and below that option will appear a menu where you can select specific dates and times you want your availability to show up in the calendar.
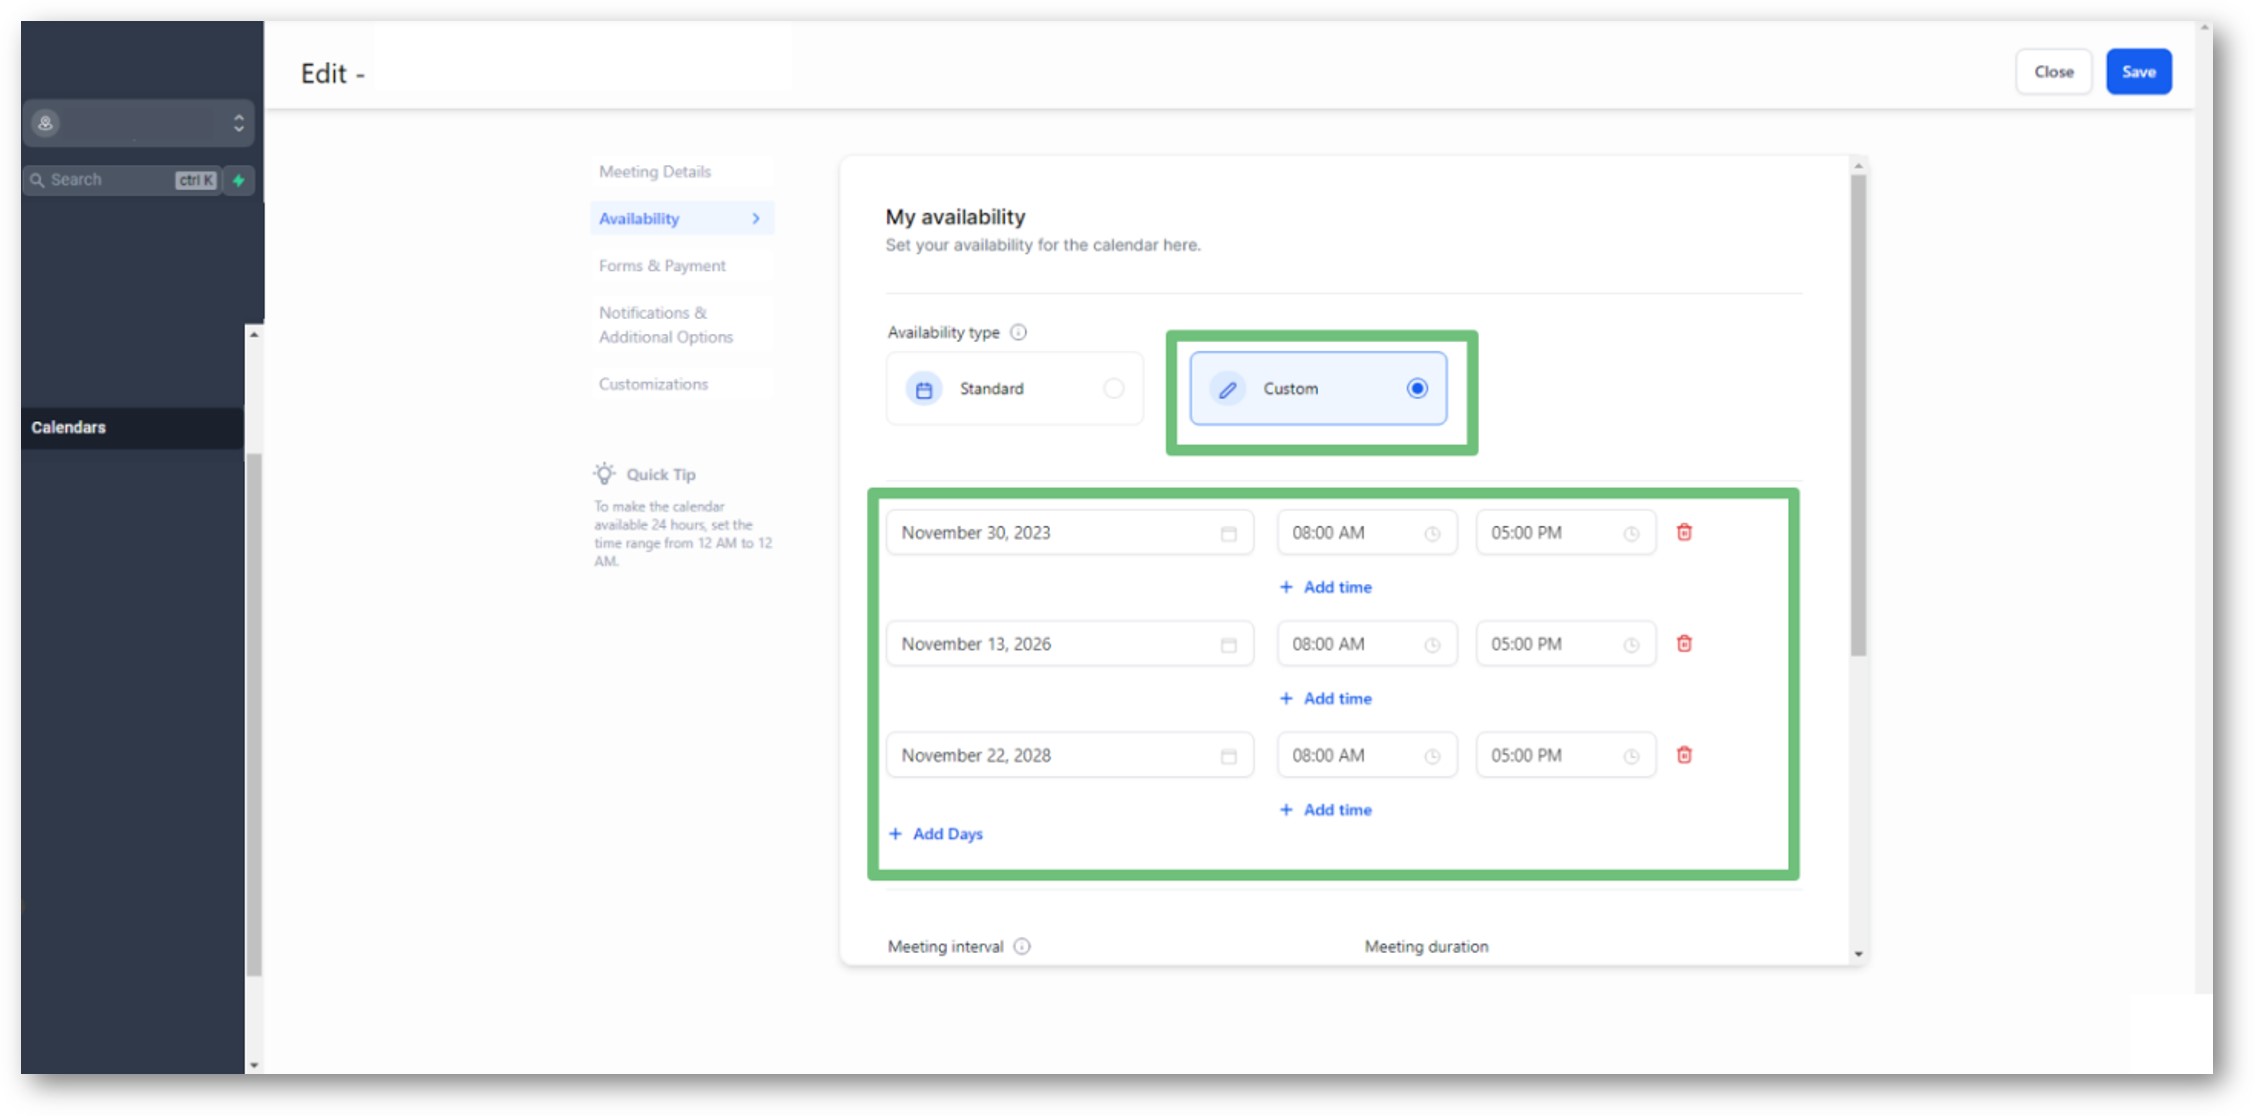
As soon as you select the specific dates and times you like, on the top right of your screen click on “Save” so the calendar will be updated automatically.
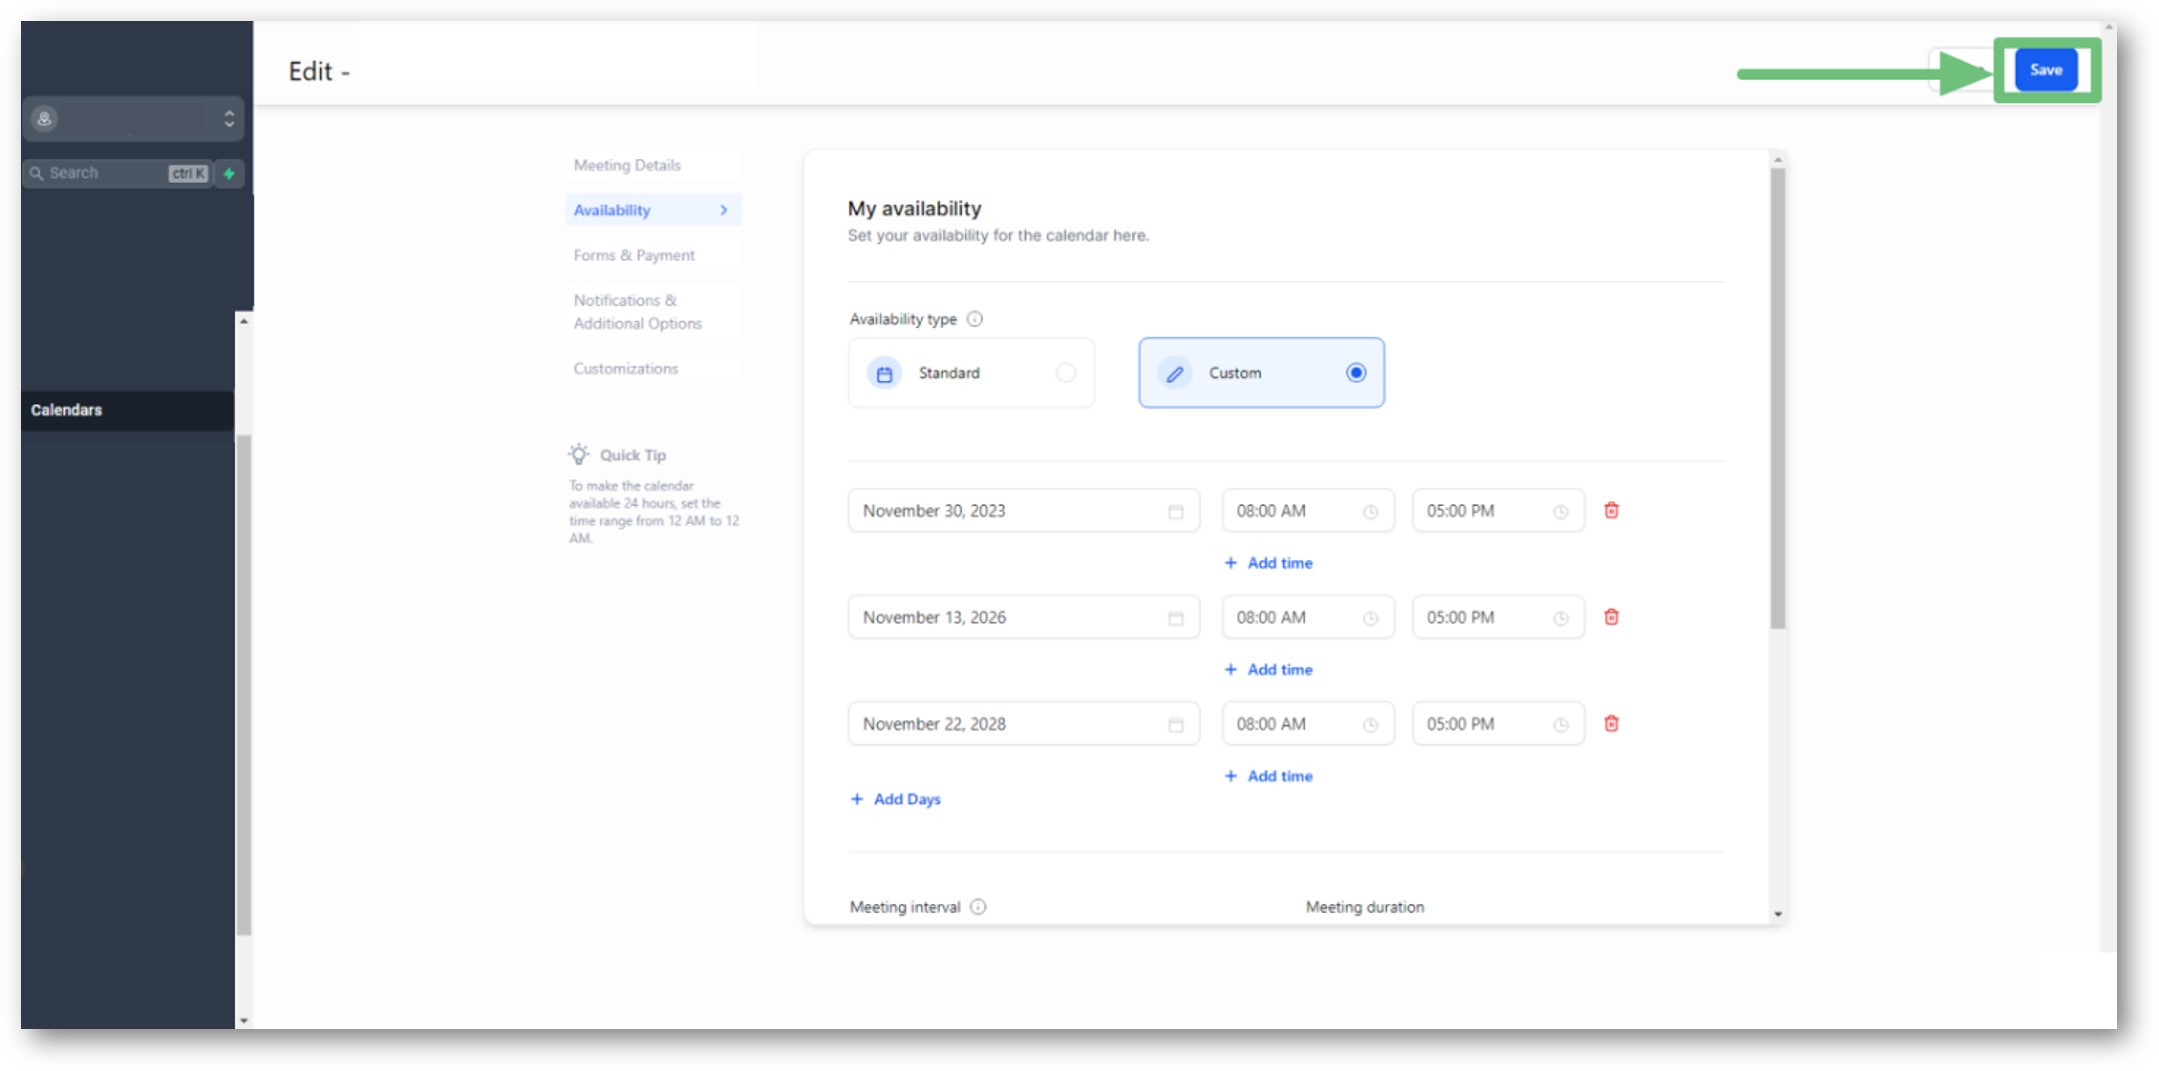
When you click on “Save” you will go back to the CRM page where you can see all your calendars. Click on the three dots on the right side of the page in the calendar you just edited. Then click “Copy Scheduling Link”.
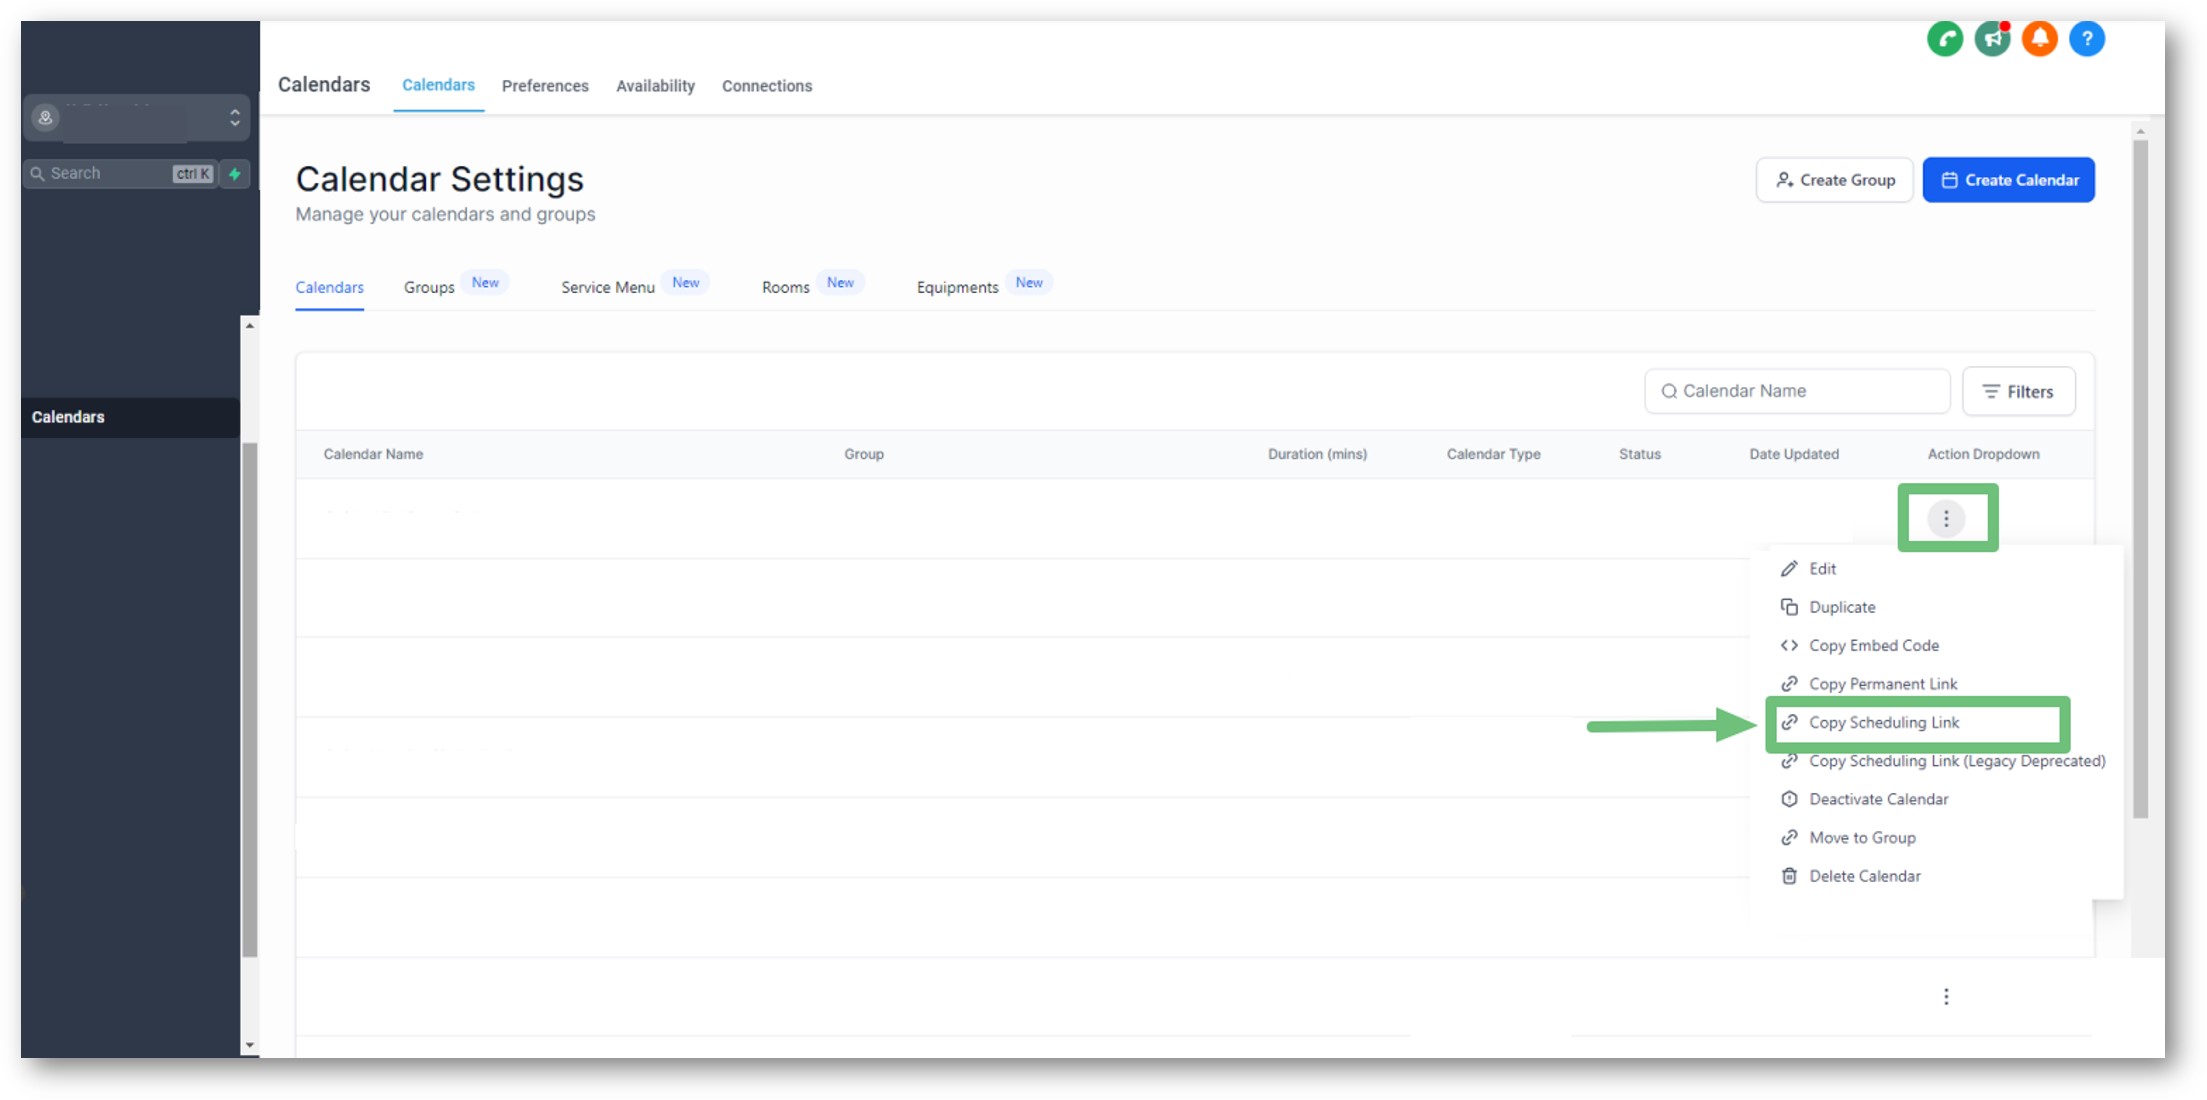
As soon as you click on “Copy Scheduling Link” open a new tab on your browser. Paste the link and the calendar you just edited will open up and now the custom dates you selected on the calendar will appear as available!
